Let’s face it–most full-time RVs have more than one electronic device running Windows. While there are certainly some that stick to Apple (pricey) or Linux operating systems (free!), this post will hopefully be useful to those of you wishing to squeeze the most out of your data plans.
With truly unlimited and unthrottled data connections a precious commodity, and campground wireless typically no better than it was 10 years ago, most of us aren’t helping things by letting Windows download updates on each of our devices. Simply put, if you have more than one device, you’re using twice what you need to in order to keep things up-to-date.
Even checking for updates, which your computer most likely does once a week, uses somewhere in the neighborhood of 200MB. To put that in perspective, if you were to have two laptops, checking once a week (1.7GB), with 2 phones on Verizon’s 12GB+2GB/line plan for $120/month, your update checking is costing you about $13/month, plus taxes, if you exactly use your data allotment. But there’s a way to reduce that, especially in the long run. How is that possible without foregoing important updates?
Good question. We still have to ultimately check for updates and download them. In theory, if you had absolutely nothing better to do, you could look over the list of installed updates and compare them to a list on Microsoft’s website. But that would probably take hours, and is prone to errors.
What I’m going to show how to do here is use a tool that’s designed to facilitate offline updating. The updates still come directly from Microsoft, but they’re downloaded and organized so you can put them on a USB stick or other shared location in your RV and update all of your devices from a single download. It also means that you can easily download all of the updates, instead of sometimes downloading and installing, only to find out that there are more to get afterwards. In other words, you can make quick use of good internet spots–whether the public library, coffee shop, diner, or bar. I recommend a stiff drink with a Windows machine…
Getting Updates
The tool we’re going to use is WSUS Offline Update (click to visit download page). The link to download is in the upper right, under the heading Most Recent Version. It’s free, but there is a donate button if you find it useful–I’m sure the author is appreciative of every donation, big or small. It’s a small, quick download (about 3MB), so go ahead and grab it so you can follow along.
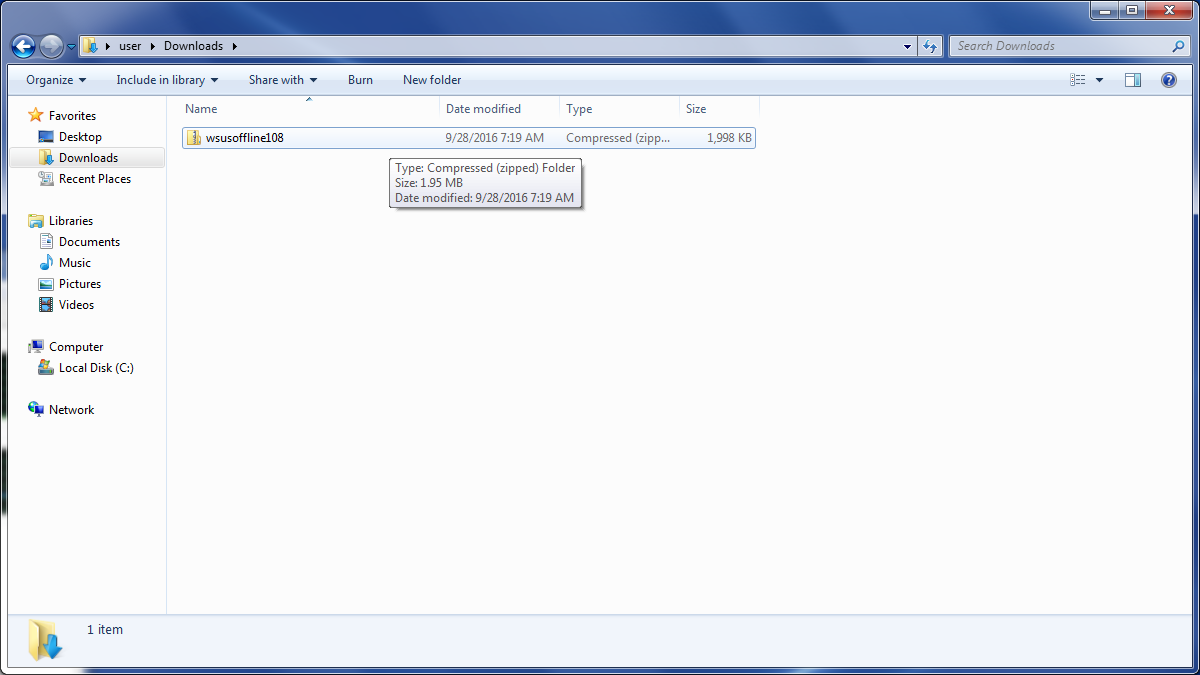
Start by finding the file you downloaded, most likely in your downloads folder. Right-click the file, and select Extract all…
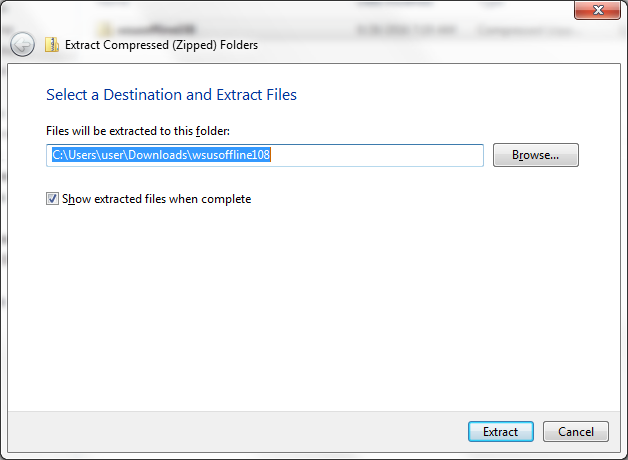
Click Extract to decompress the file. By default, it’ll be unzipped wherever you saved it, which is fine:
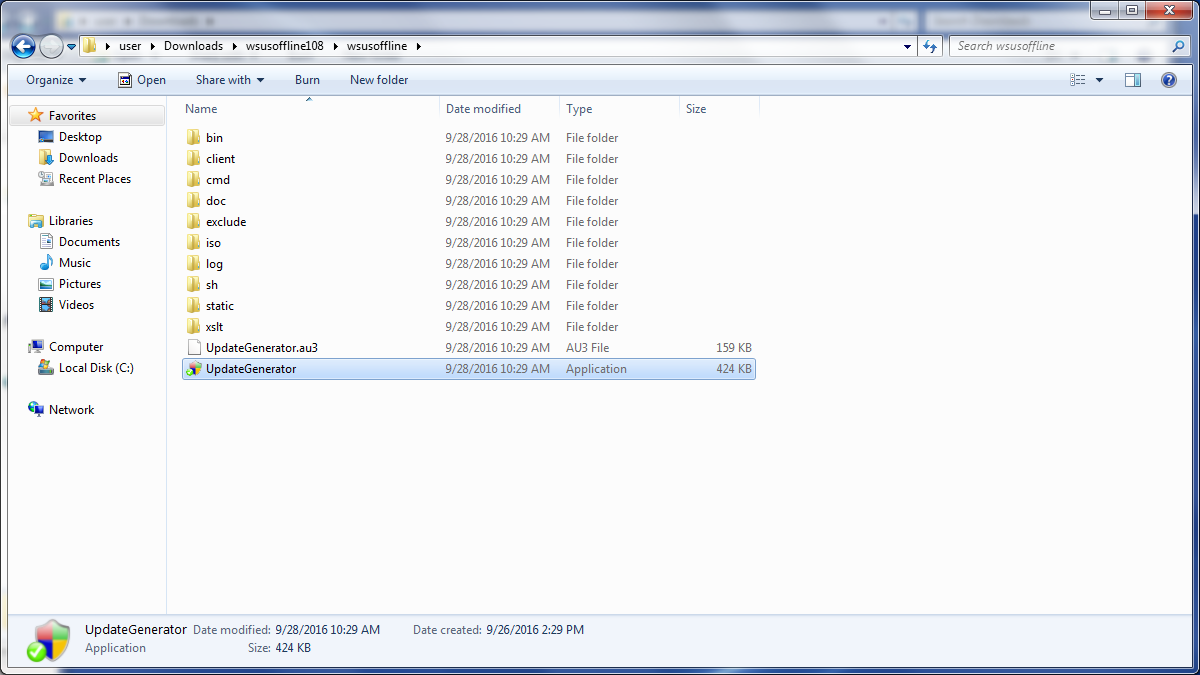
Open the extracted folder, and locate the Update Generator application. Windows will prompt you to allow it to run.
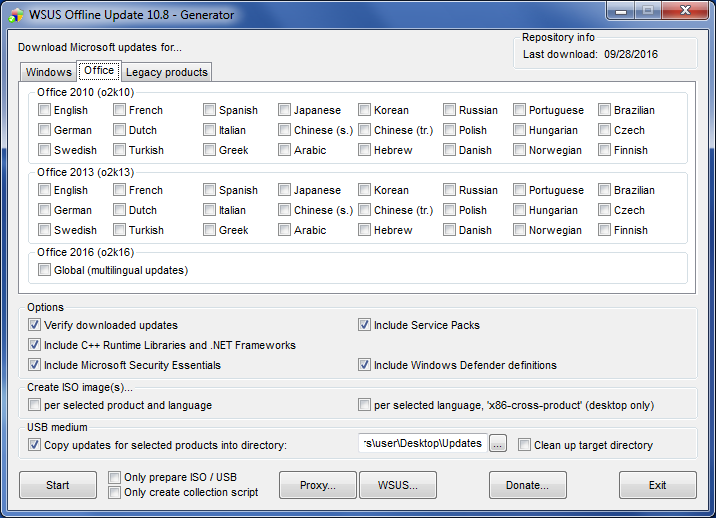
When the program opens, you’ll have 3 tabs with options for which types of updates to grab. If you have multiple machines running different operating system versions, you may need to select several. Also check out the Office tab to get updates for Microsoft Office products.
Most casual users won’t need C++ Runtime Libraries or .NET Frameworks. Select the option to verify downloaded updates–this will perform a mathematical calculation on the files’ contents, generating a fingerprint that’s compared to a known value, which helps to confirm that there were no download errors.
Most won’t need to create an ISO image (which could be used to burn a CD), but you may want to go ahead and select the option to copy updates to a USB stick. If you don’t do it here, it’s easy enough to copy the directory manually.
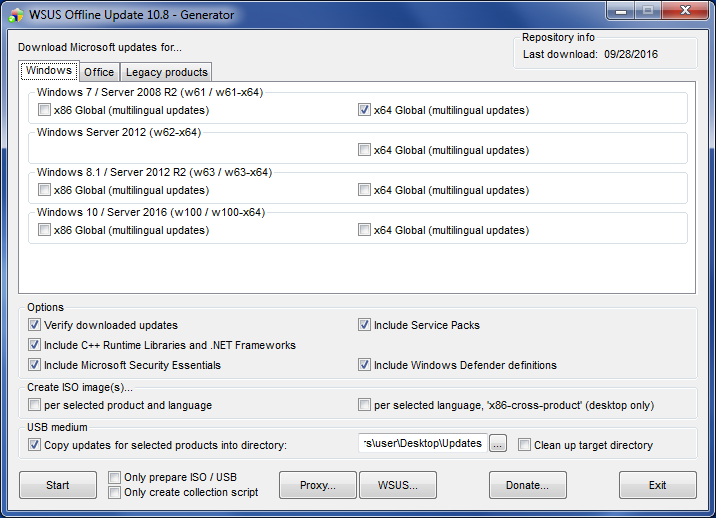
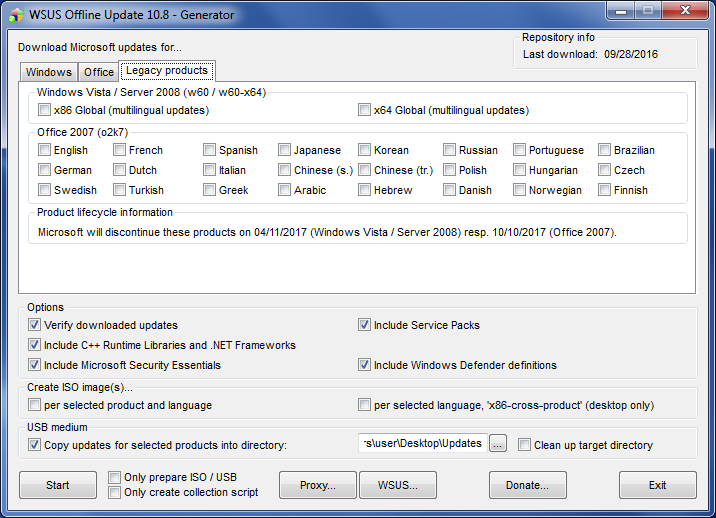
If you happen to have older software, such as Windows Vista or Office 2007, updates for those are under the Legacy products tab.
After you have everything set the way you’d like, go ahead and click Start. You’ll see a terminal window open, which will report status as the update files are downloaded. When it’s done, you’ll be asked if you want to examine the log file–go ahead and click No unless you’re curious.
Installing the Updates
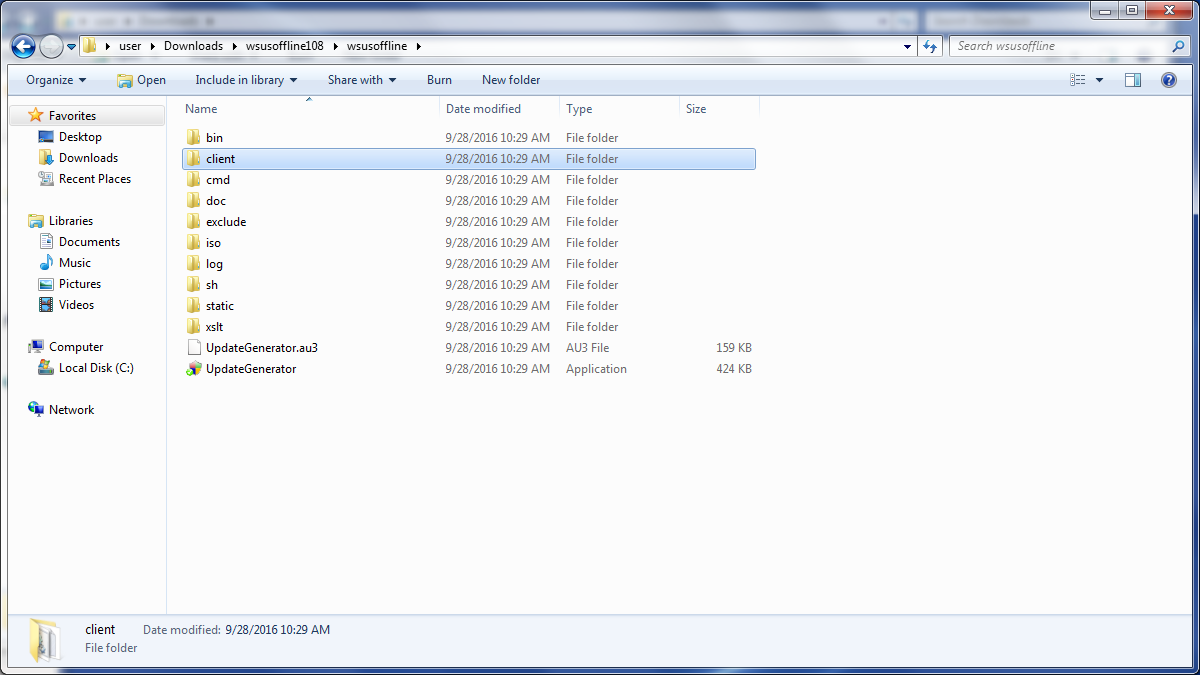
At this point you can leave your internet connection behind. The process of installing updates can be done without a connection, and you can repeat it on other machines. From the same location where you ran the update generator, locate the client folder and open it:
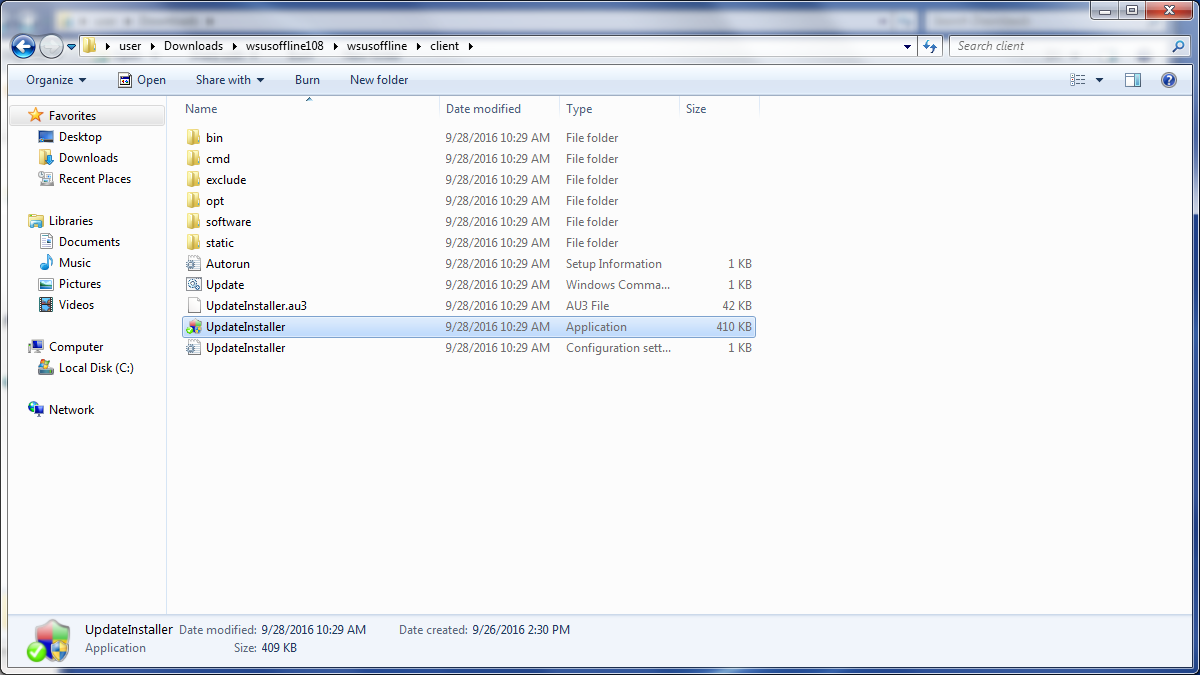
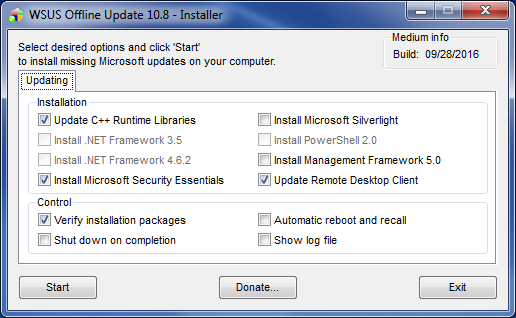
This folder contains all of the update files, and the applications to take care of installing the ones needed. Run the UpdateInstaller application, again giving permission to run it when Windows asks.
There are a few options as to what to install, depending on what all you downloaded. The Automatic reboot and recall option will restart the computer and resume installing where it’s required automatically if checked. It does temporarily disable the login password requirement, but assuming you’re letting updates install overnight, in your own place, that shouldn’t be a problem. If you don’t want to do that, you may be prompted to restart the computer. After restarting manually, simply re-run the installer.
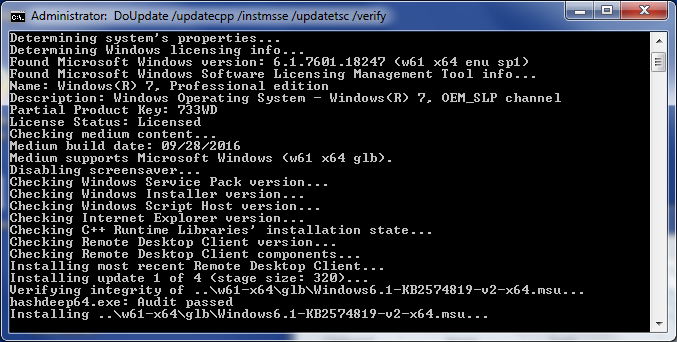
Similar to the update generator, you’ll see a command window where you can watch what’s going on:
Now for the Second (3rd, 4th, etc.) Computer
Grab the client folder and copy it to the next computer, if you didn’t copy to a USB stick during the first part of the process. Open it up, and run it to install updates just like you did on the first machine.
Tip: Save that USB stick, in the event you purchase another computer or need to re-image one. There are a typically a lot of updates to install out-of-the-box, that you would have previously downloaded.
What about checking for updates at a later time?
This is going to sound really complicated (NOT!!!). Just re-run the update generator. It’ll download the update catalog (the same thing that would be downloaded if you checked for updates from the Windows Update tool in the Control Panel. But then it will only download the files that it doesn’t already have, not the whole list. Repeat the same process for installing updates as the first time.
By doing it this way, you can keep multiple computers up-to-date with minimal data usage.
One last thing…
Open Control Panel, locate Windows Update (you may want to select one of the icon views), and change the setting so that your computer doesn’t check for updates automatically. At that point, if you happen to have the data plan I referenced earlier, you may have just saved yourself enough money to buy a couple of milkshakes every month!