This post will take me longer to write up than it did to actually do the project. I have a portable icemaker that’s several years old sitting right behind the passenger seat. It keeps a fresh batch of ice ready all the time, but it recently started showing the “add water” light even when the reservoir was filled. A new one can be had for [amazon_link asins=’B00INXG9MY’ template=’PriceLink’ store=’rvne-20′ marketplace=’US’ link_id=’22778b15-7000-11e7-bfb0-ad828dfb73a6′] on Amazon, and would have been here in a couple of days.
I couldn’t see getting rid of an appliance that likely just had a bad microswitch. When I listened to it pumping, it sounded like there was a little backflow from the switch/check-valve assembly–a small plastic part that I wasn’t going to be able to track down for a buck or two. Instead of replacing it, I decided to look at the control board and see if I could bypass it. Fortunately, the board is relatively simple, labeled in English, and there’s a wiring diagram on the back of the enclosure.
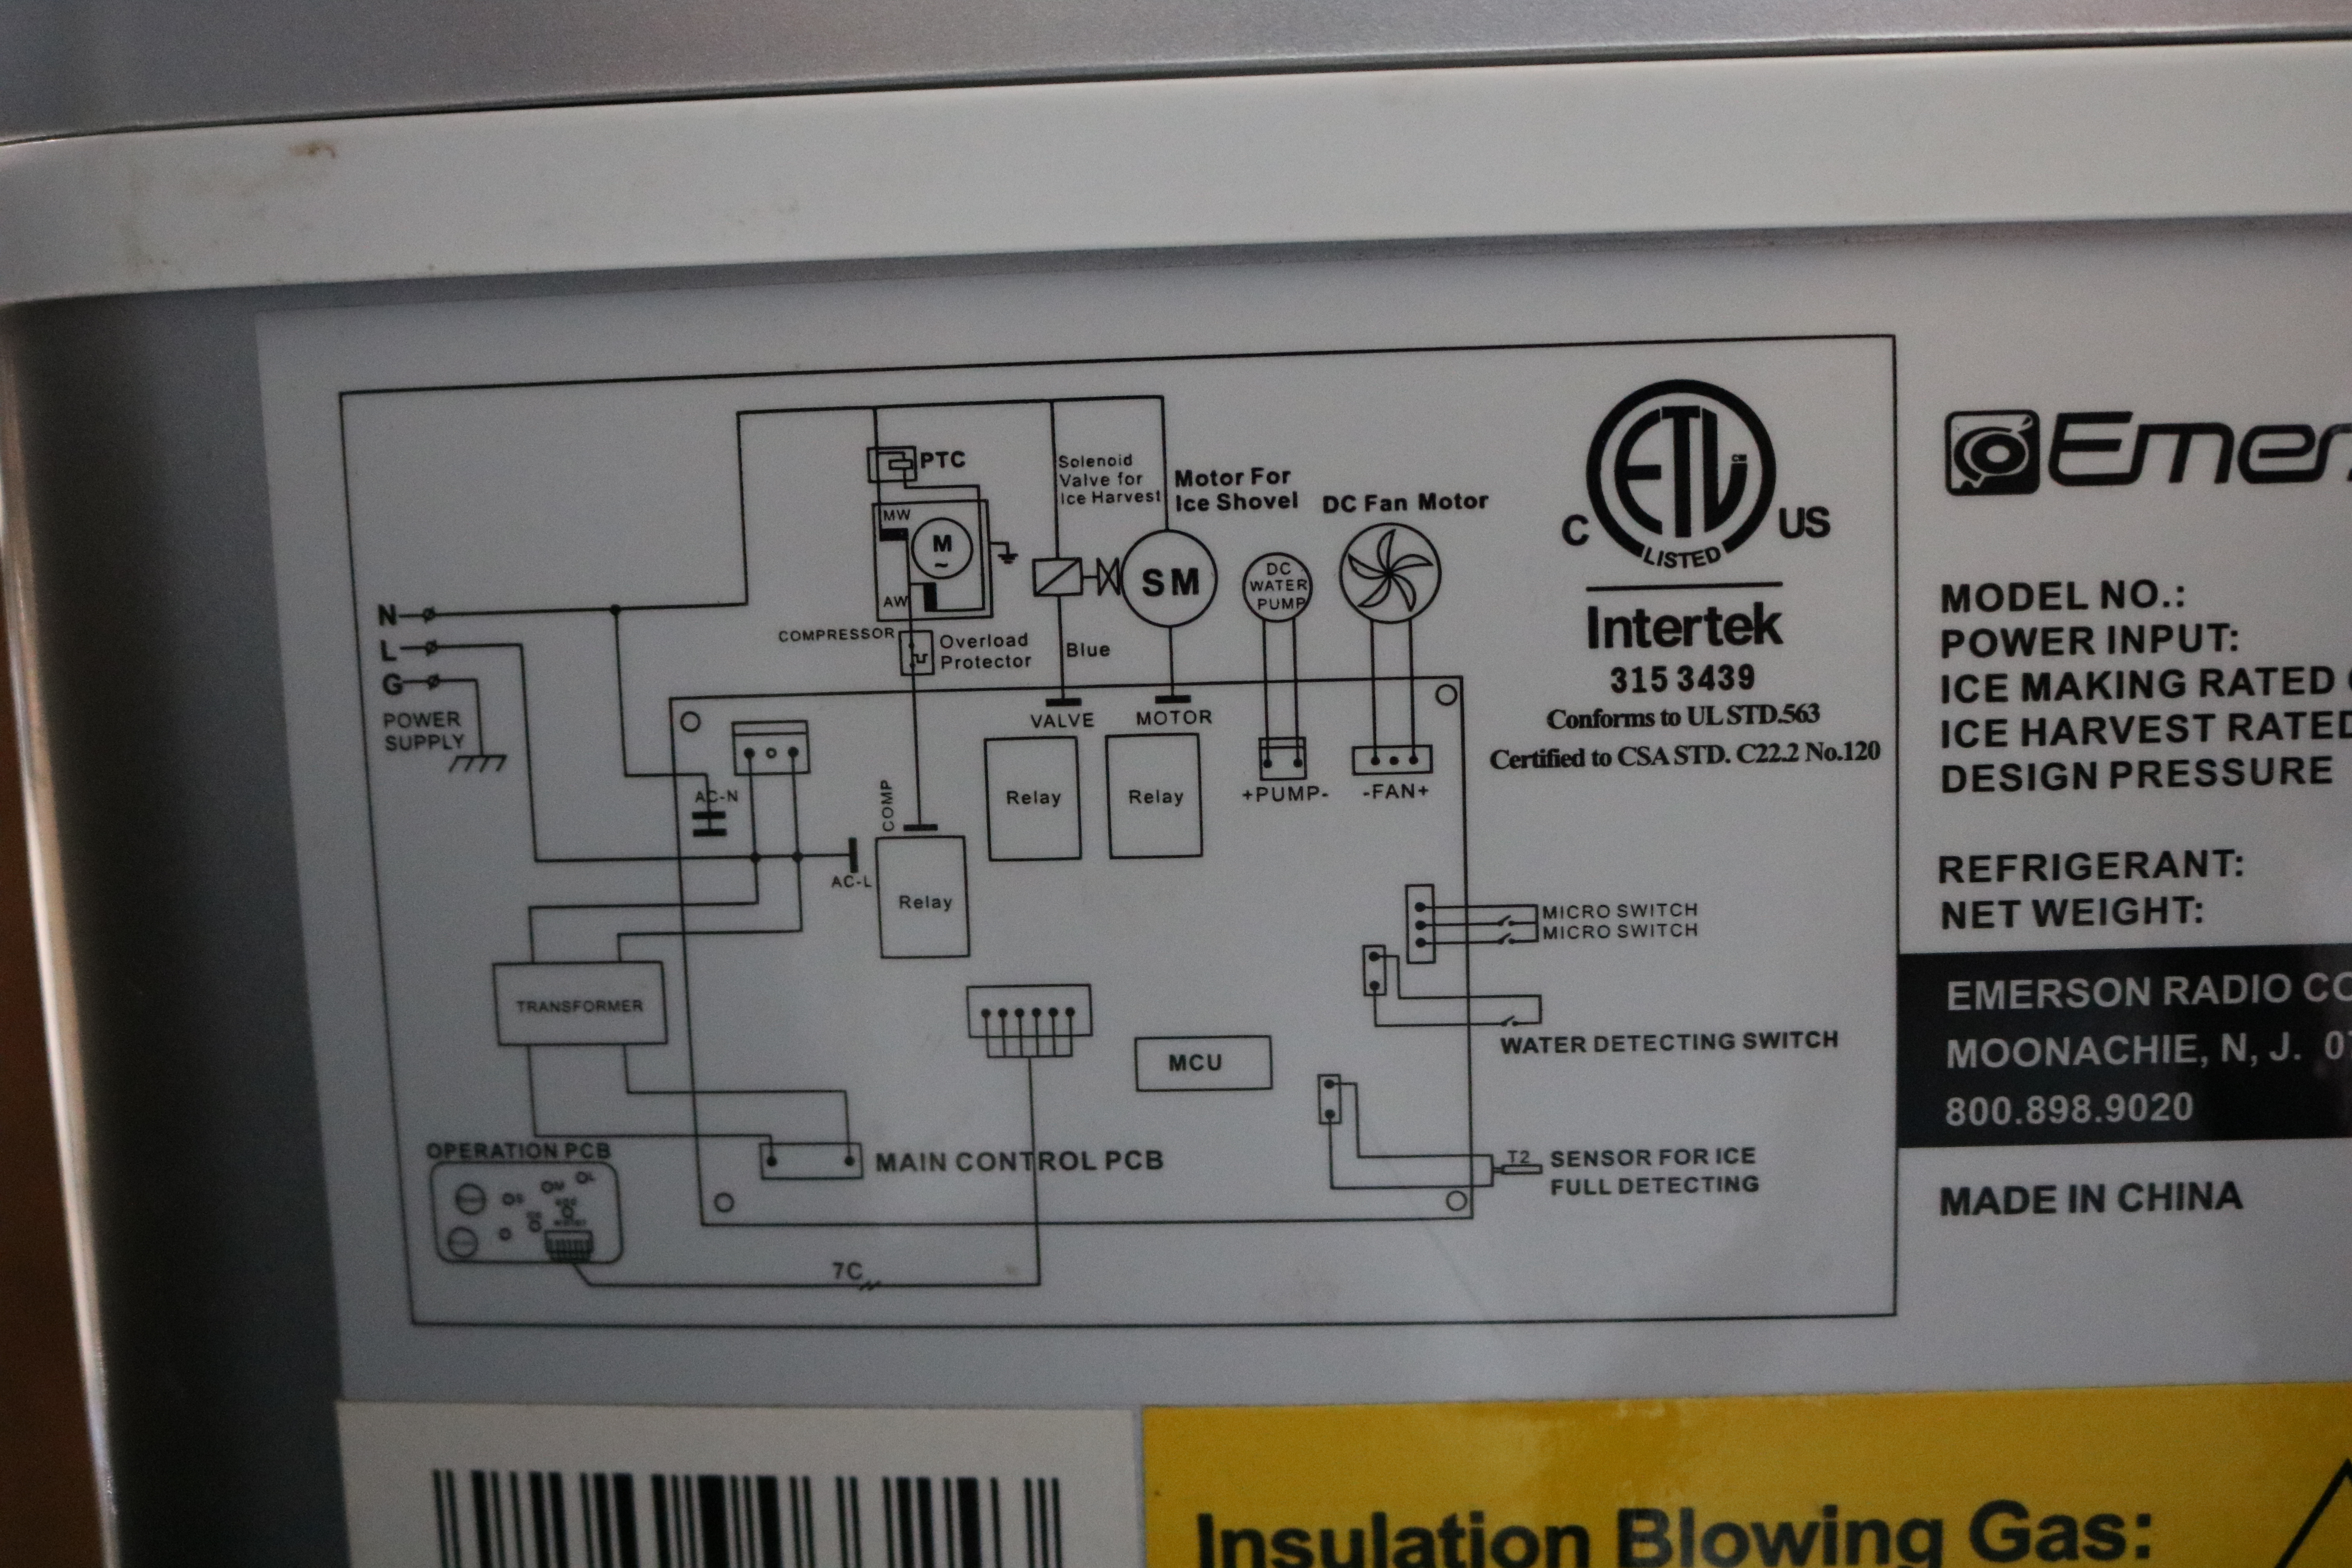
Sure enough, you can. If it runs out of water, I might ruin the pump, but then I’m just back to where I am now. When you look at the board, the water switch plugs in on the right side. The switch should be normally open, closing when water is present–but it isn’t. I temporarily closed the contacts myself, and lo-and-behold, it works!
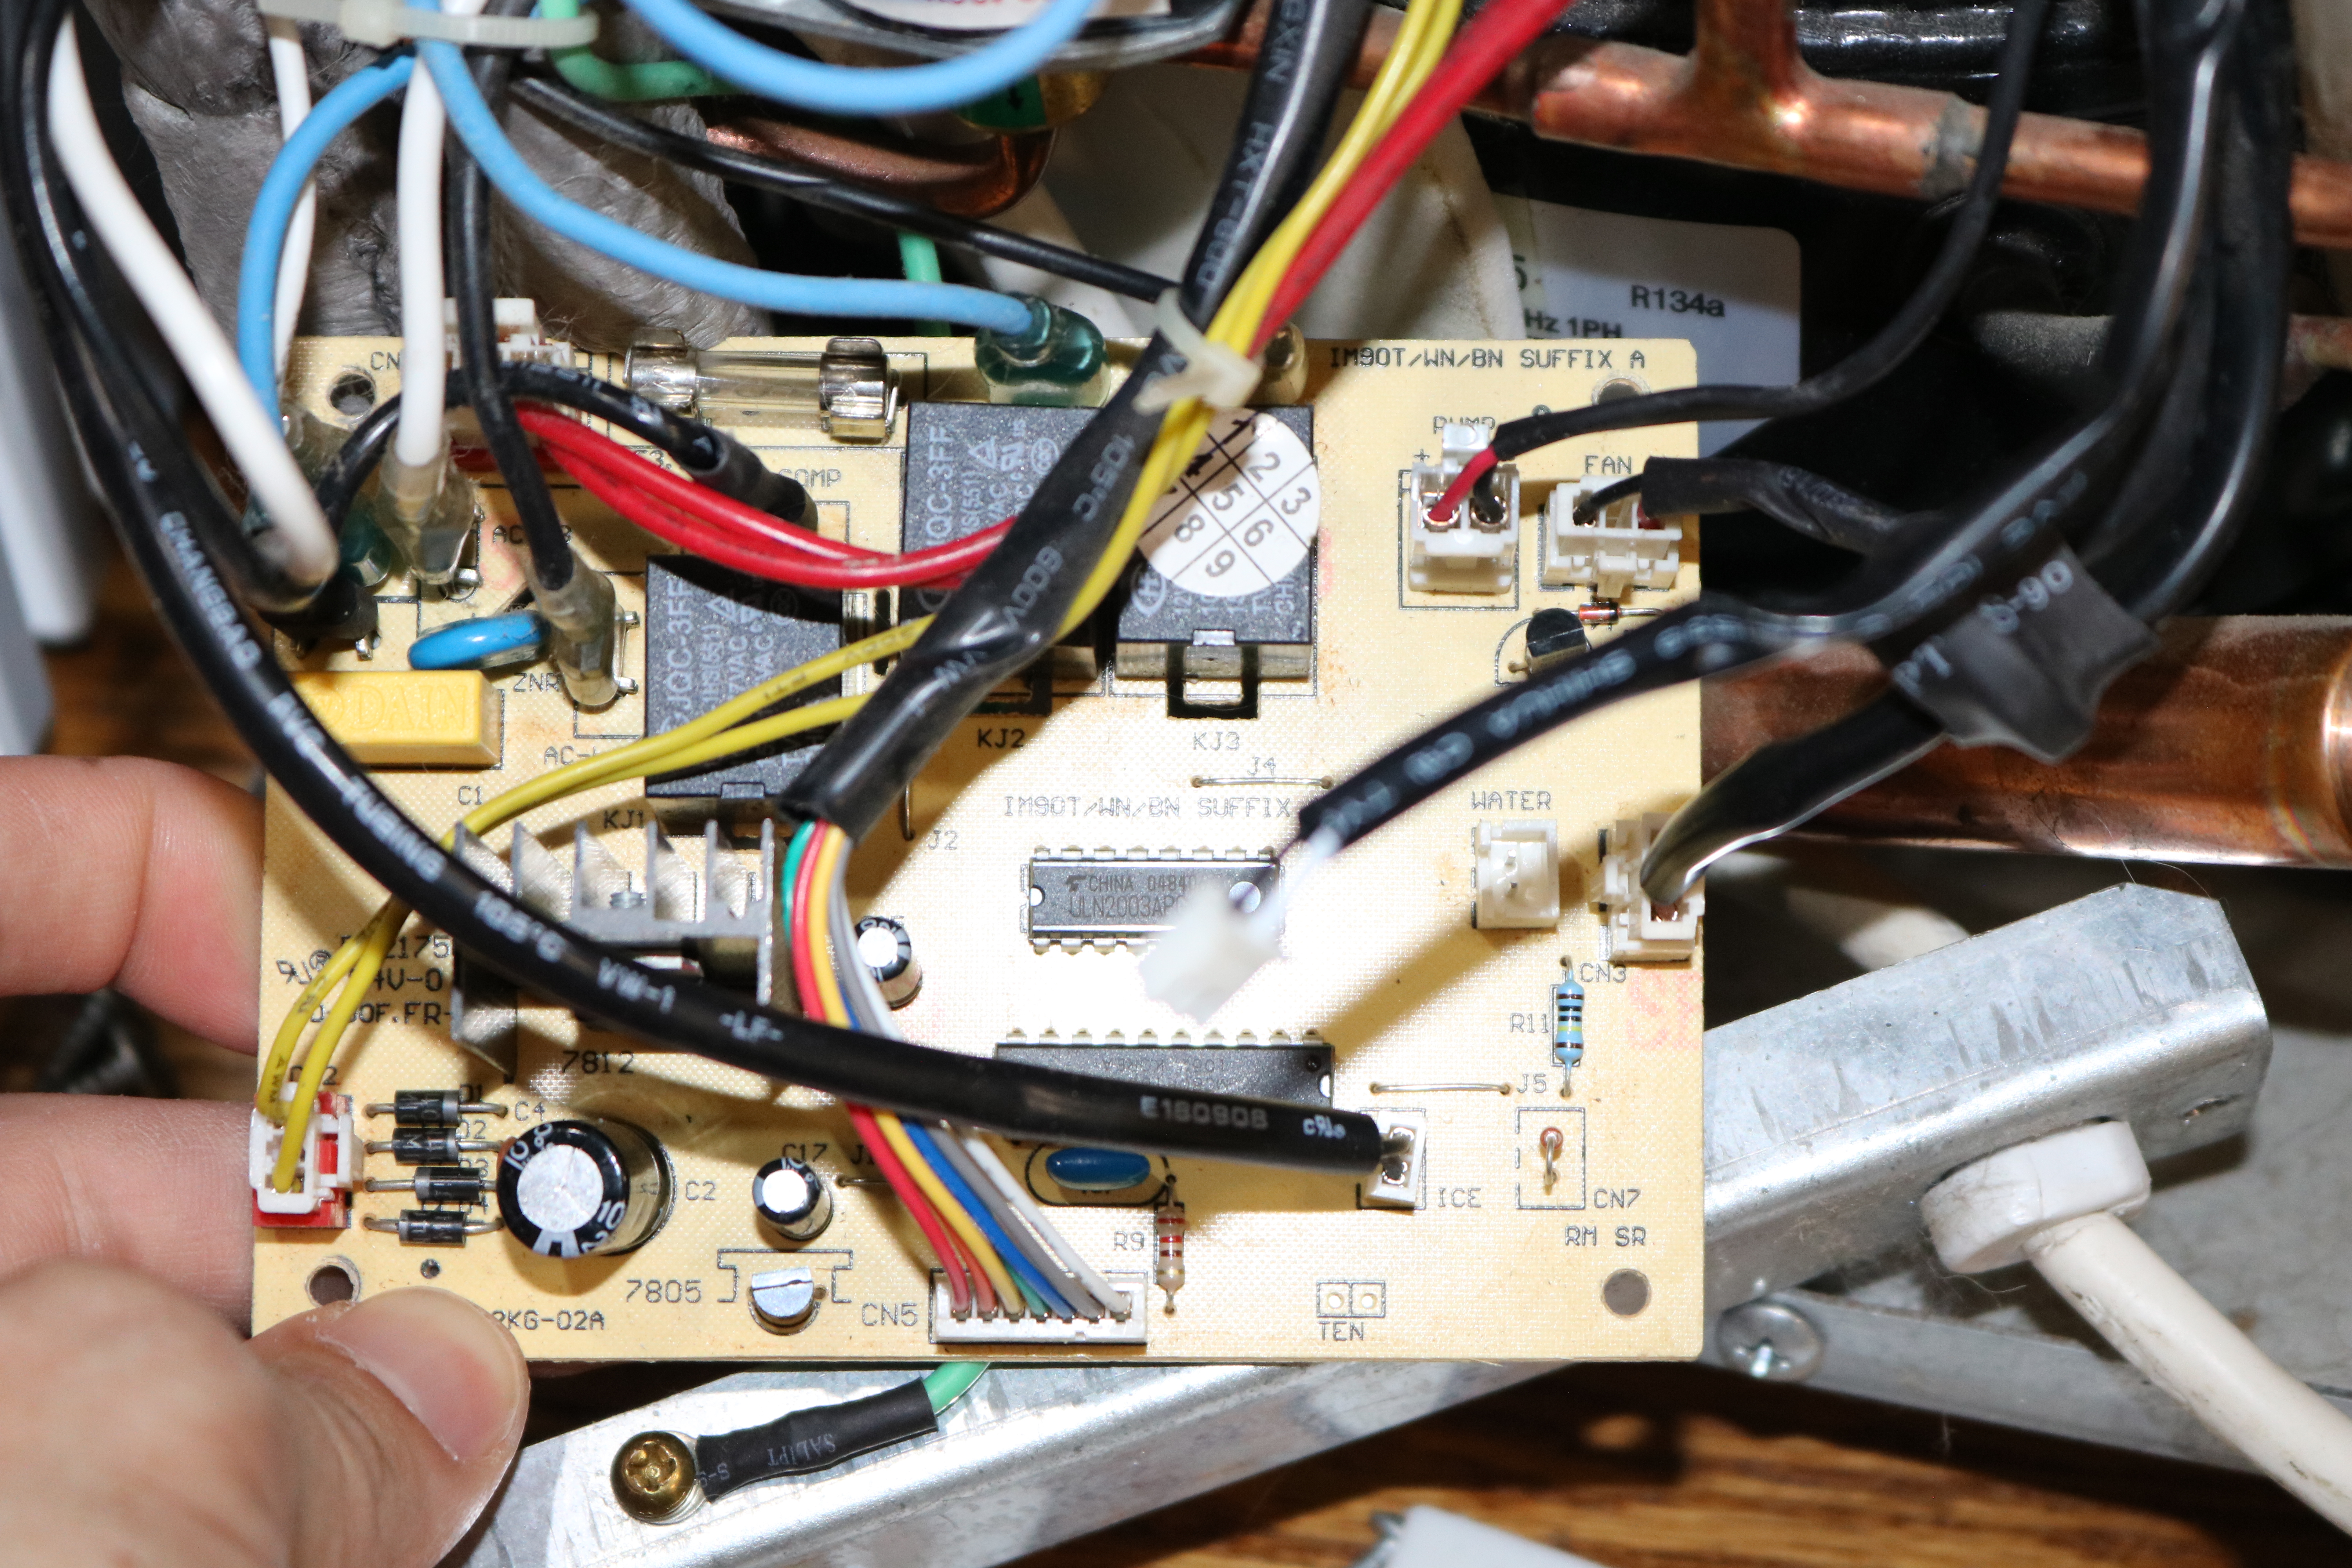
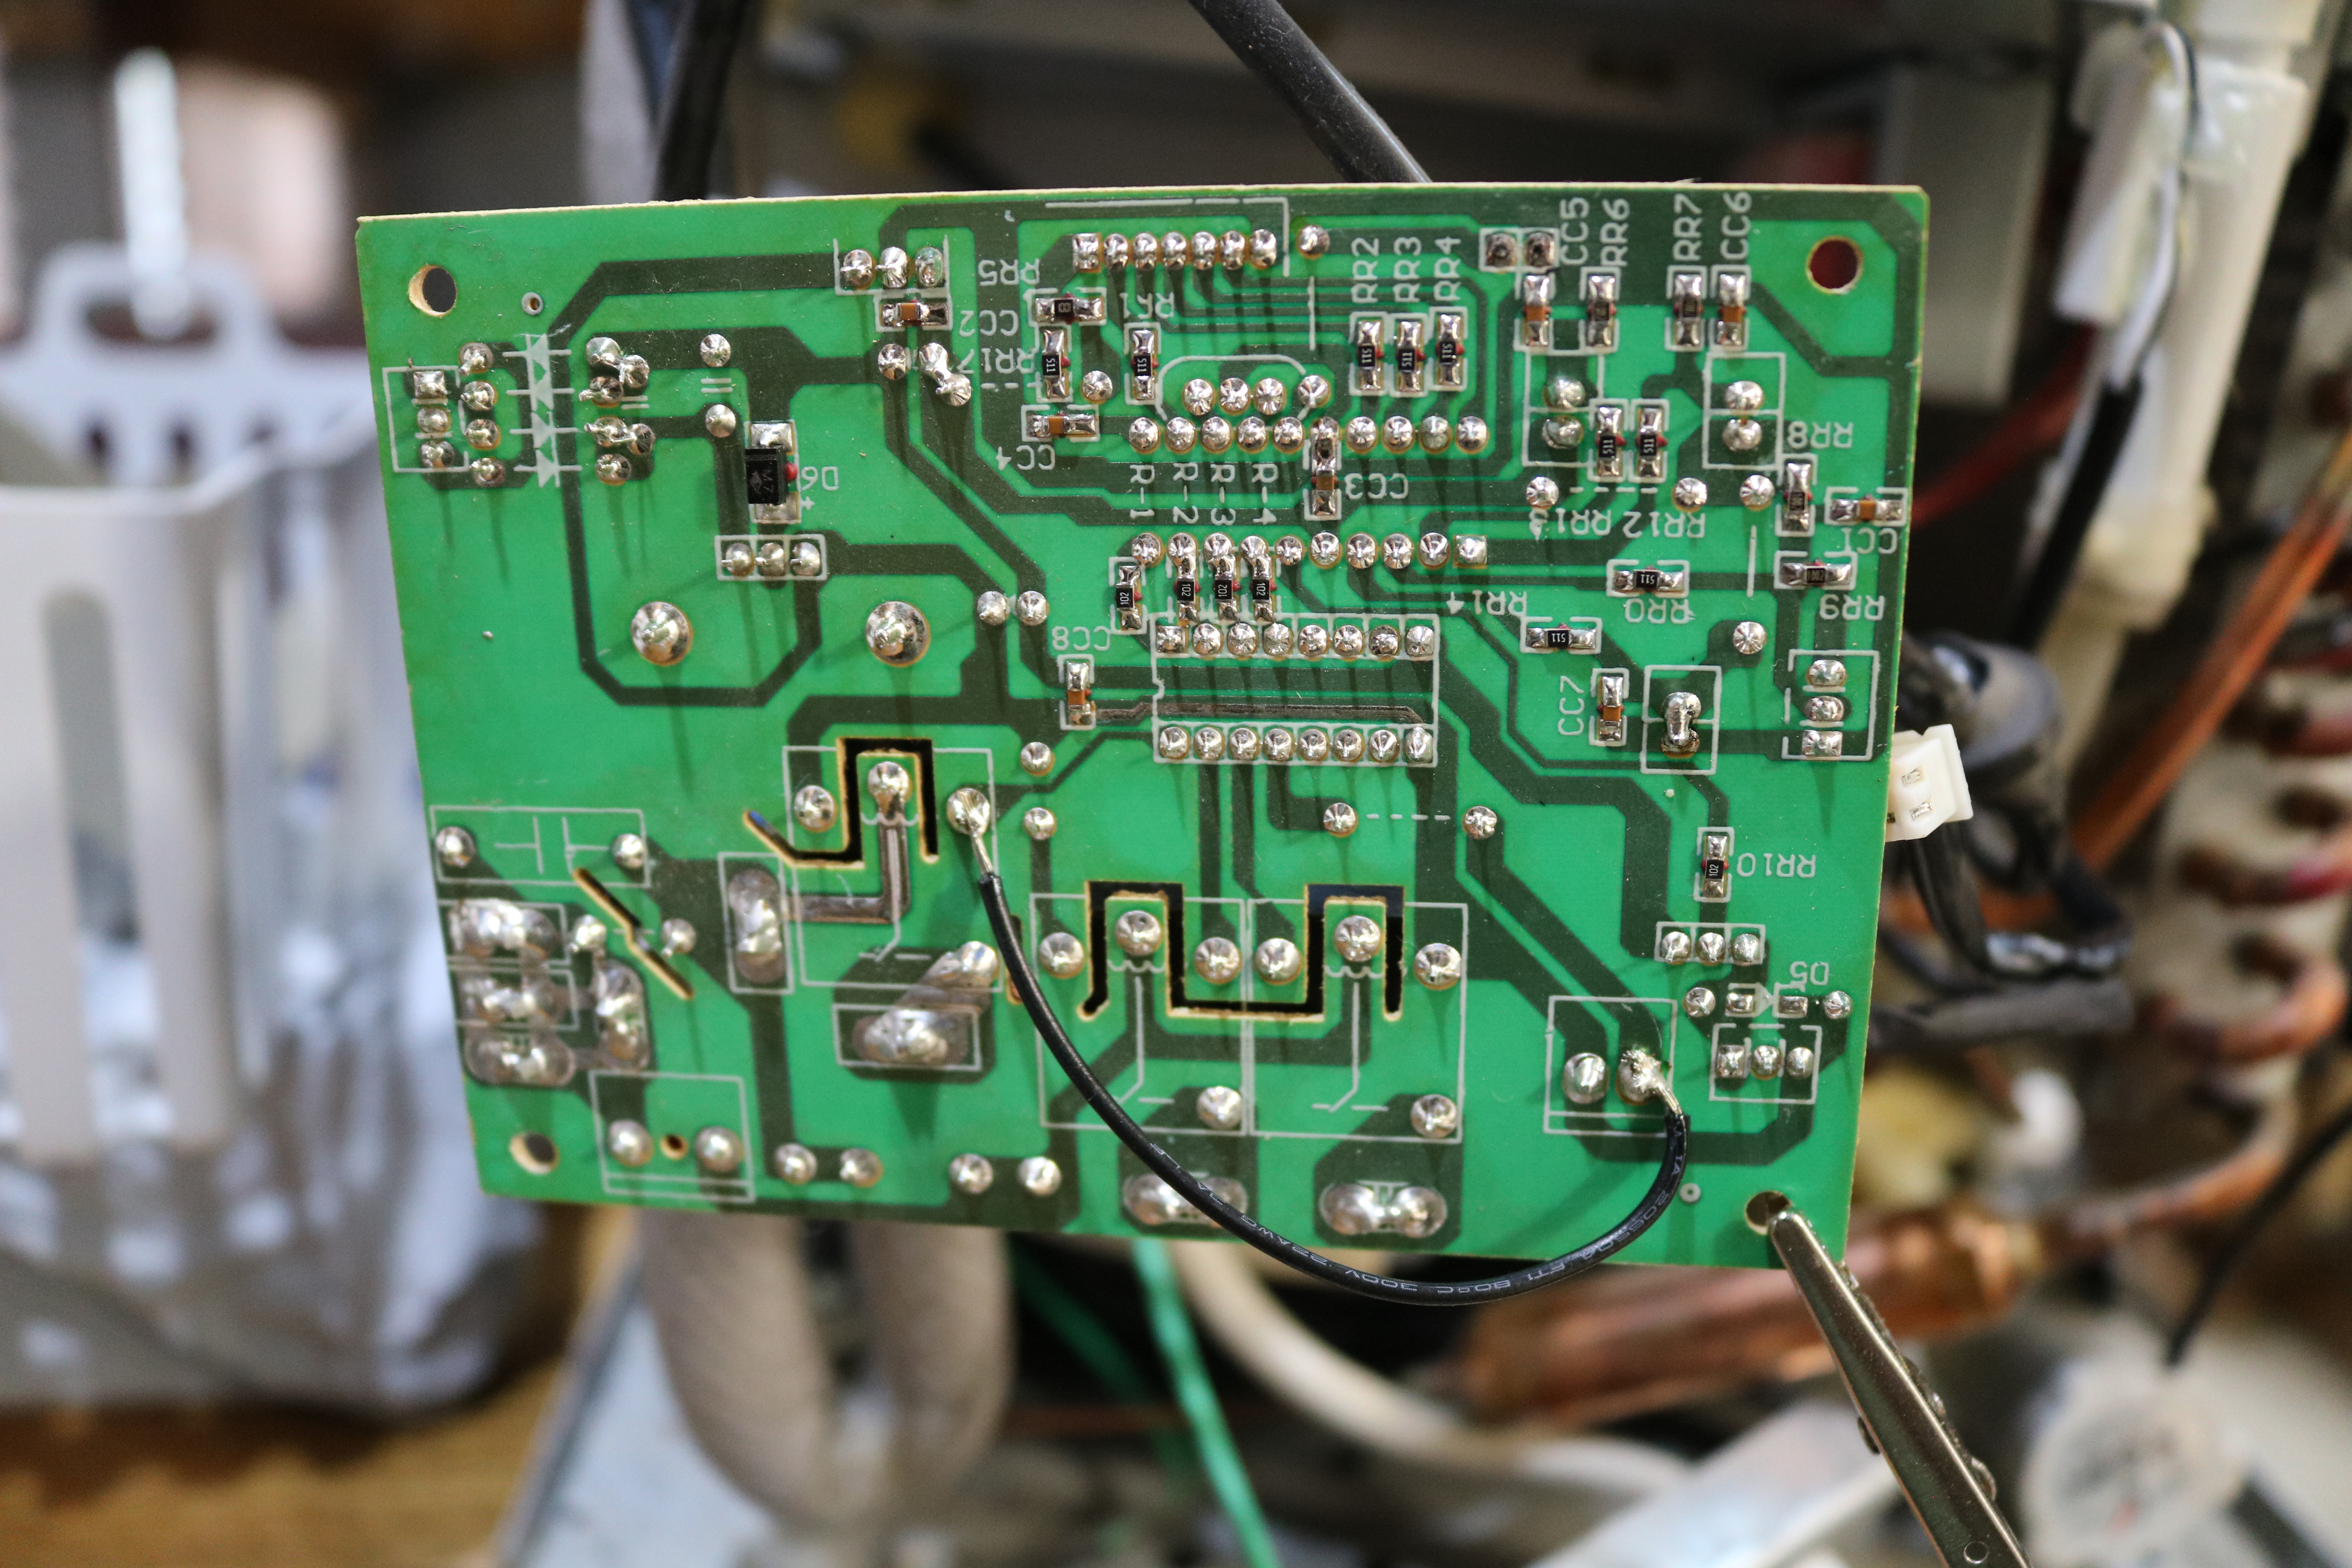
Now we just need to make it permanent. Here’s what the back side of the board looks like:
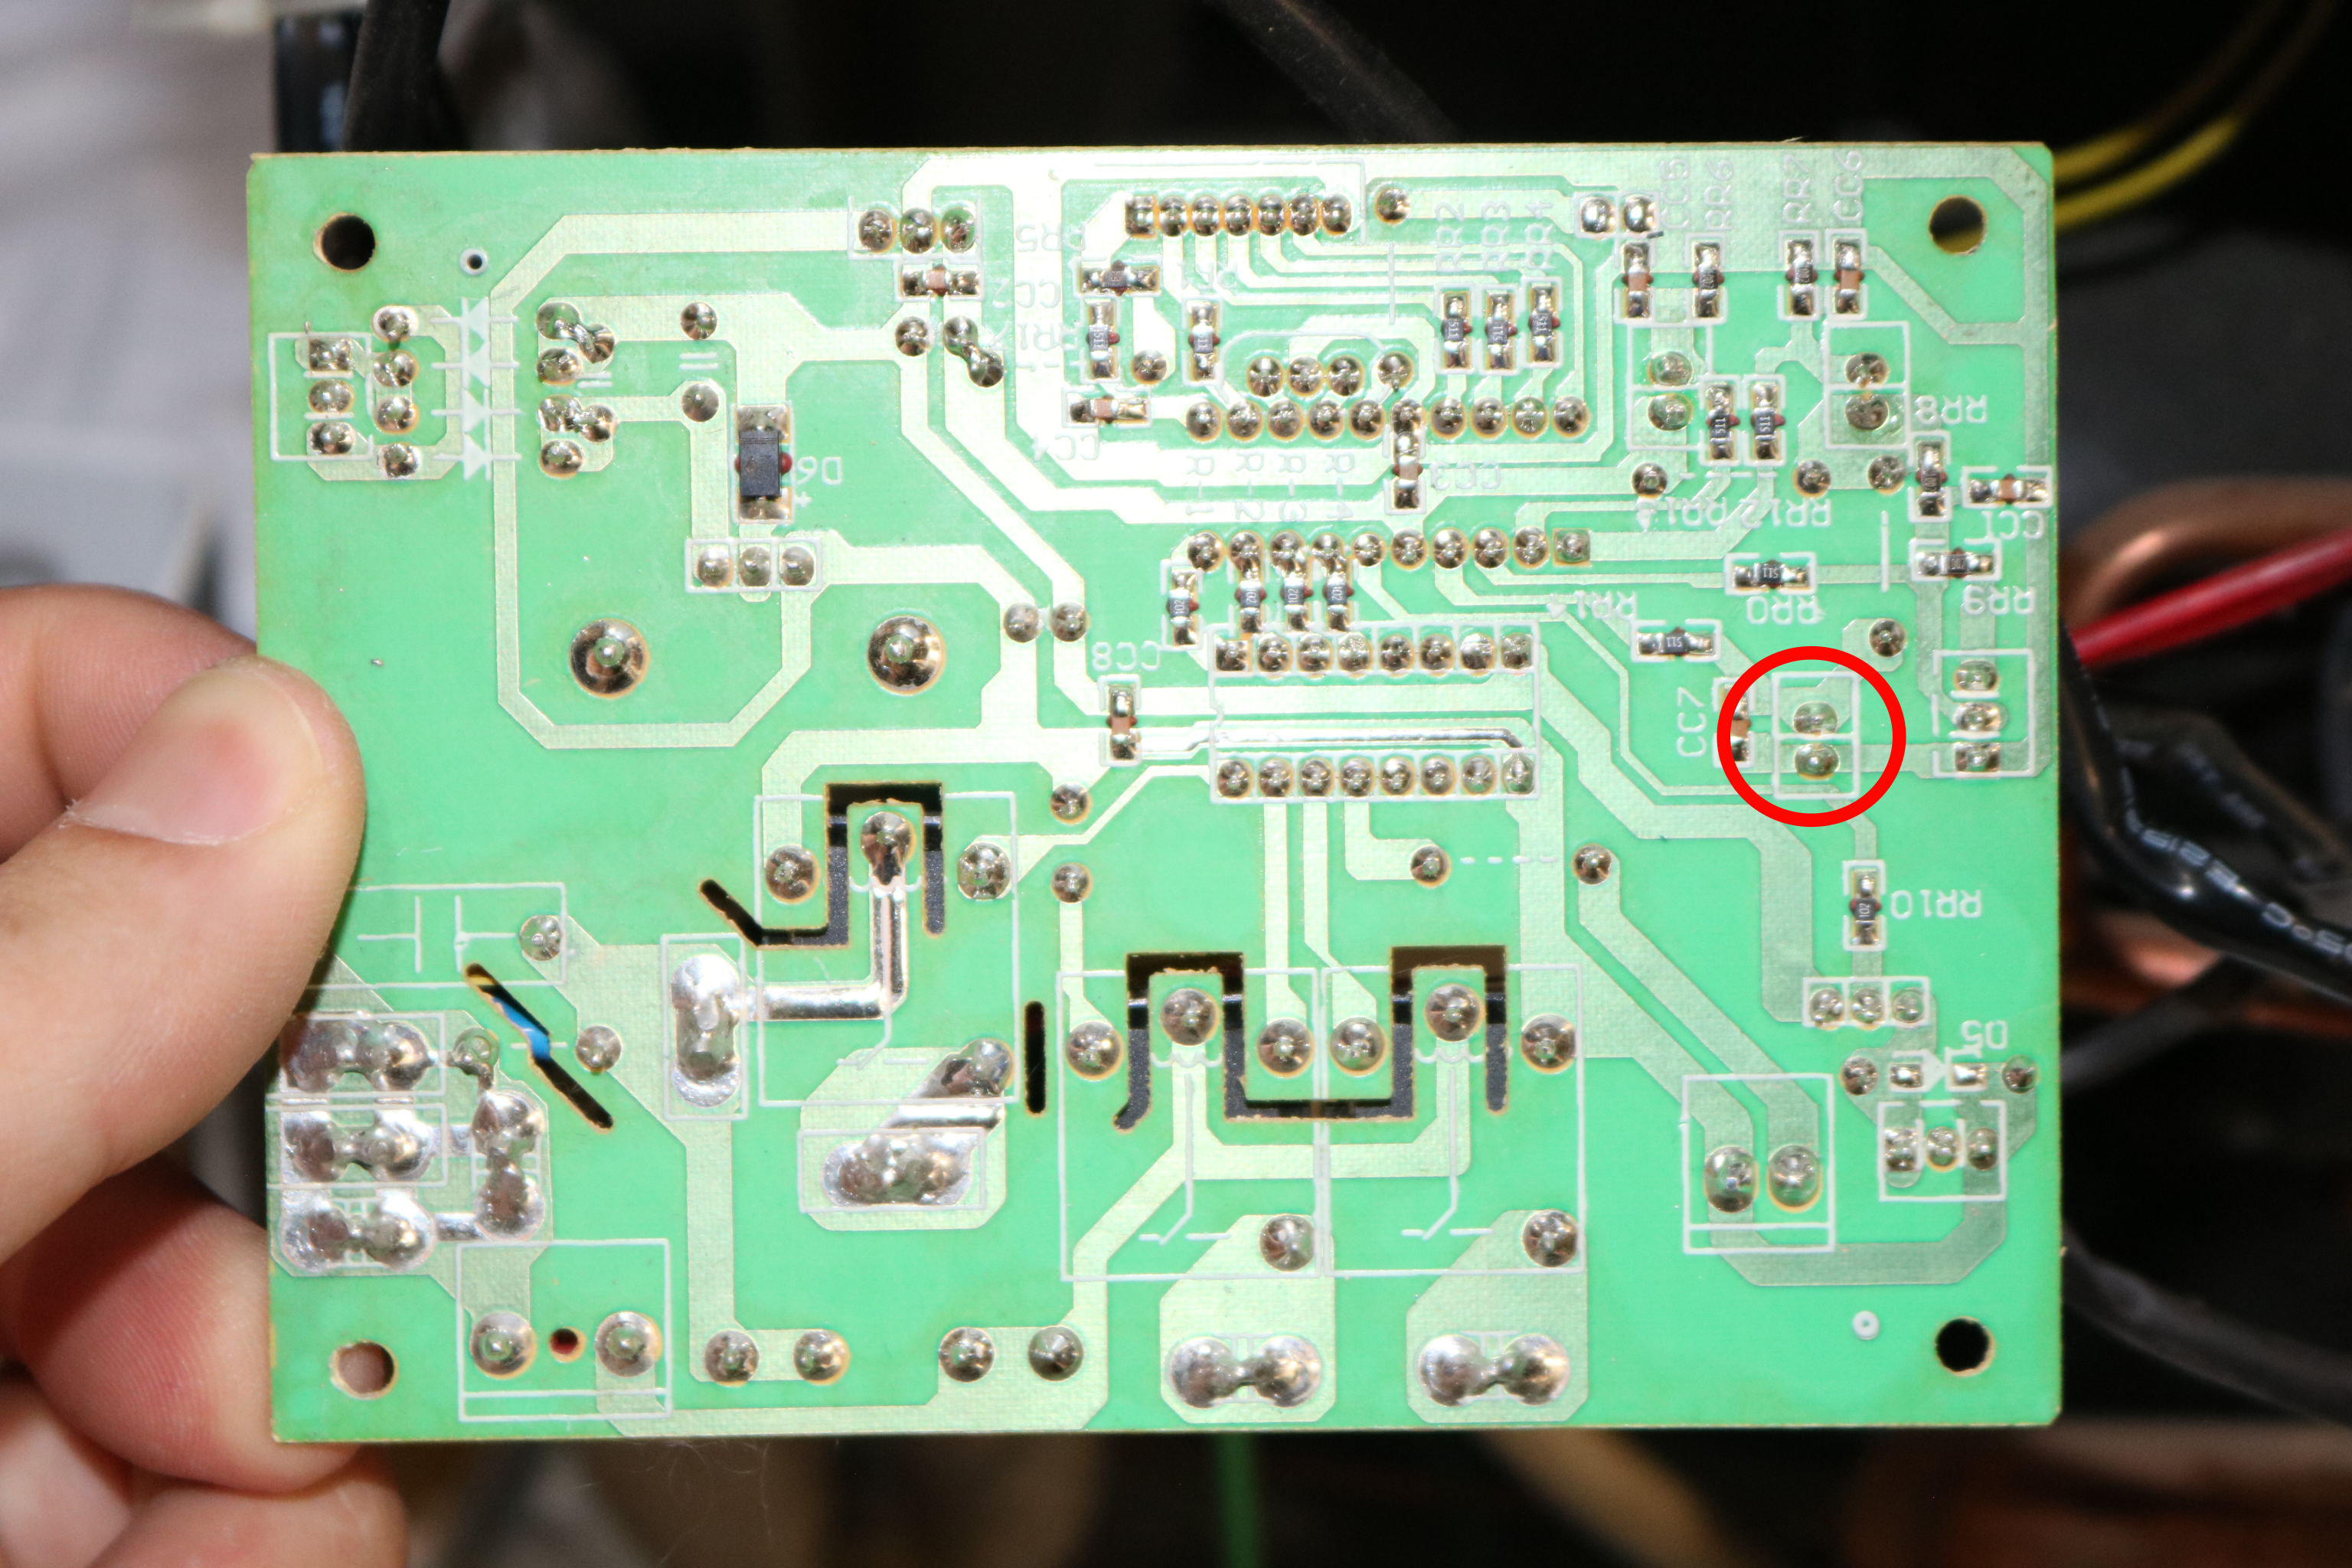
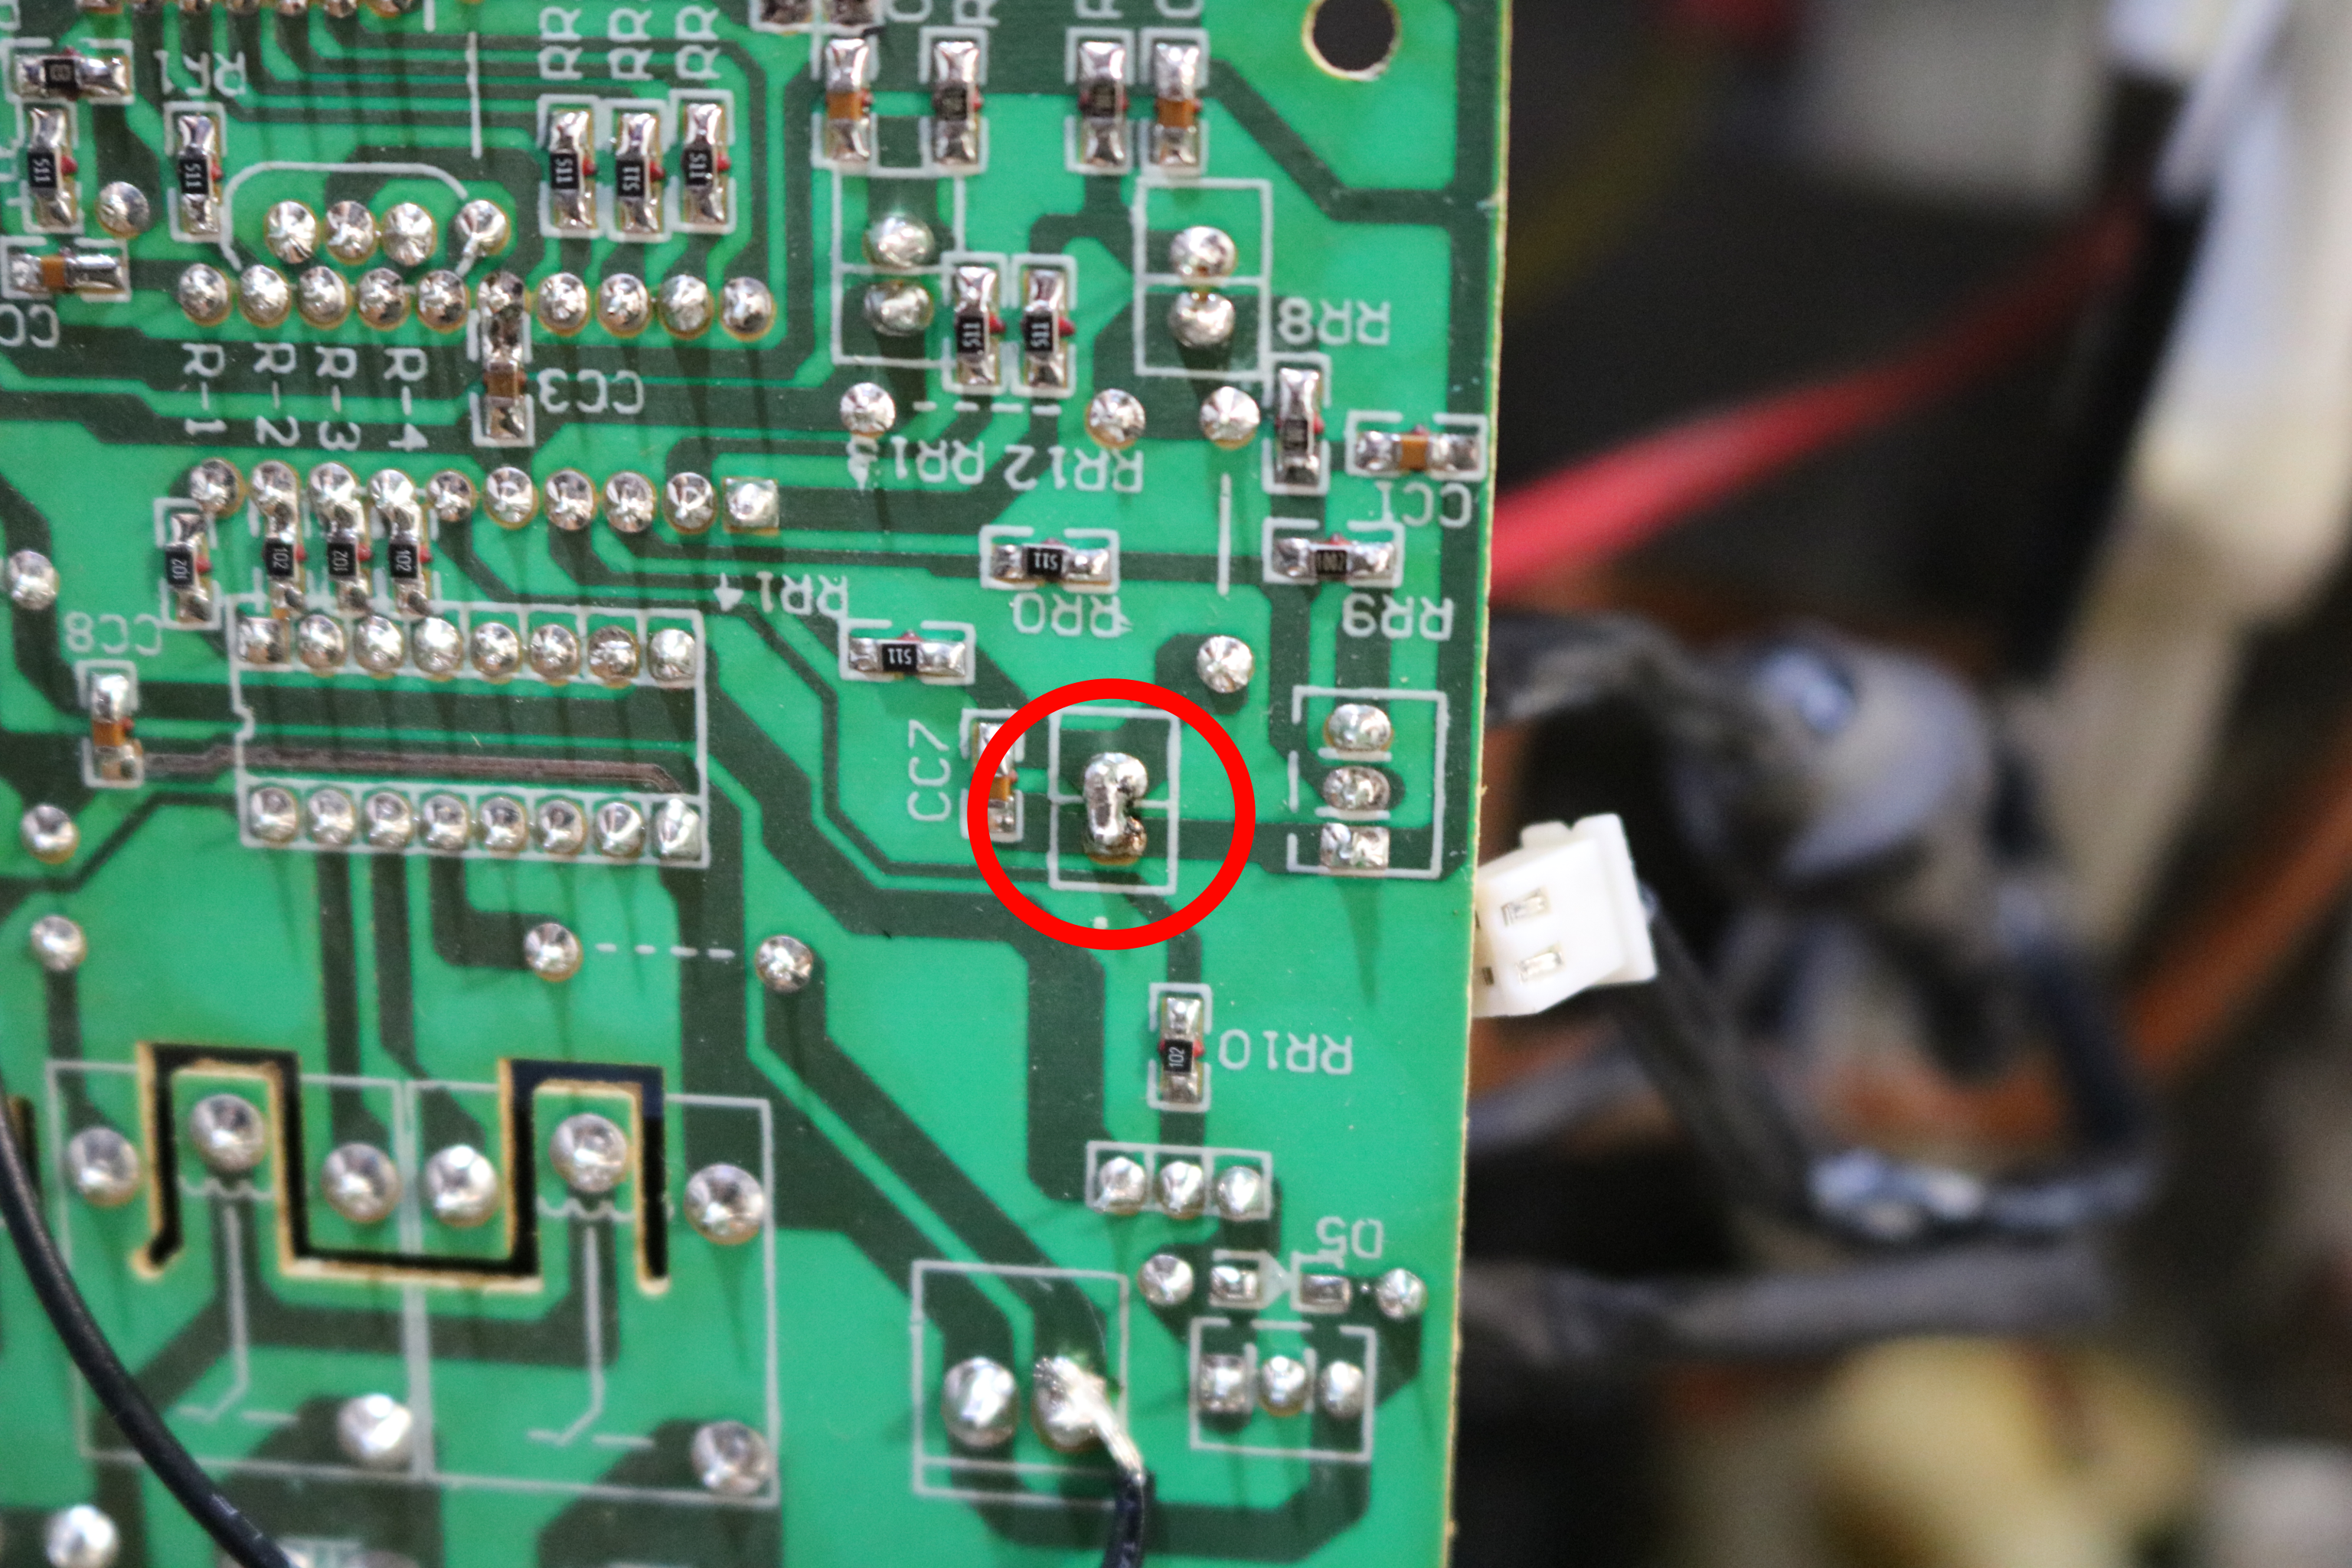
The red circle shows the water switch connector. It’s easy enough to bridge the two contacts with solder–here’s what it looks like afterwards:
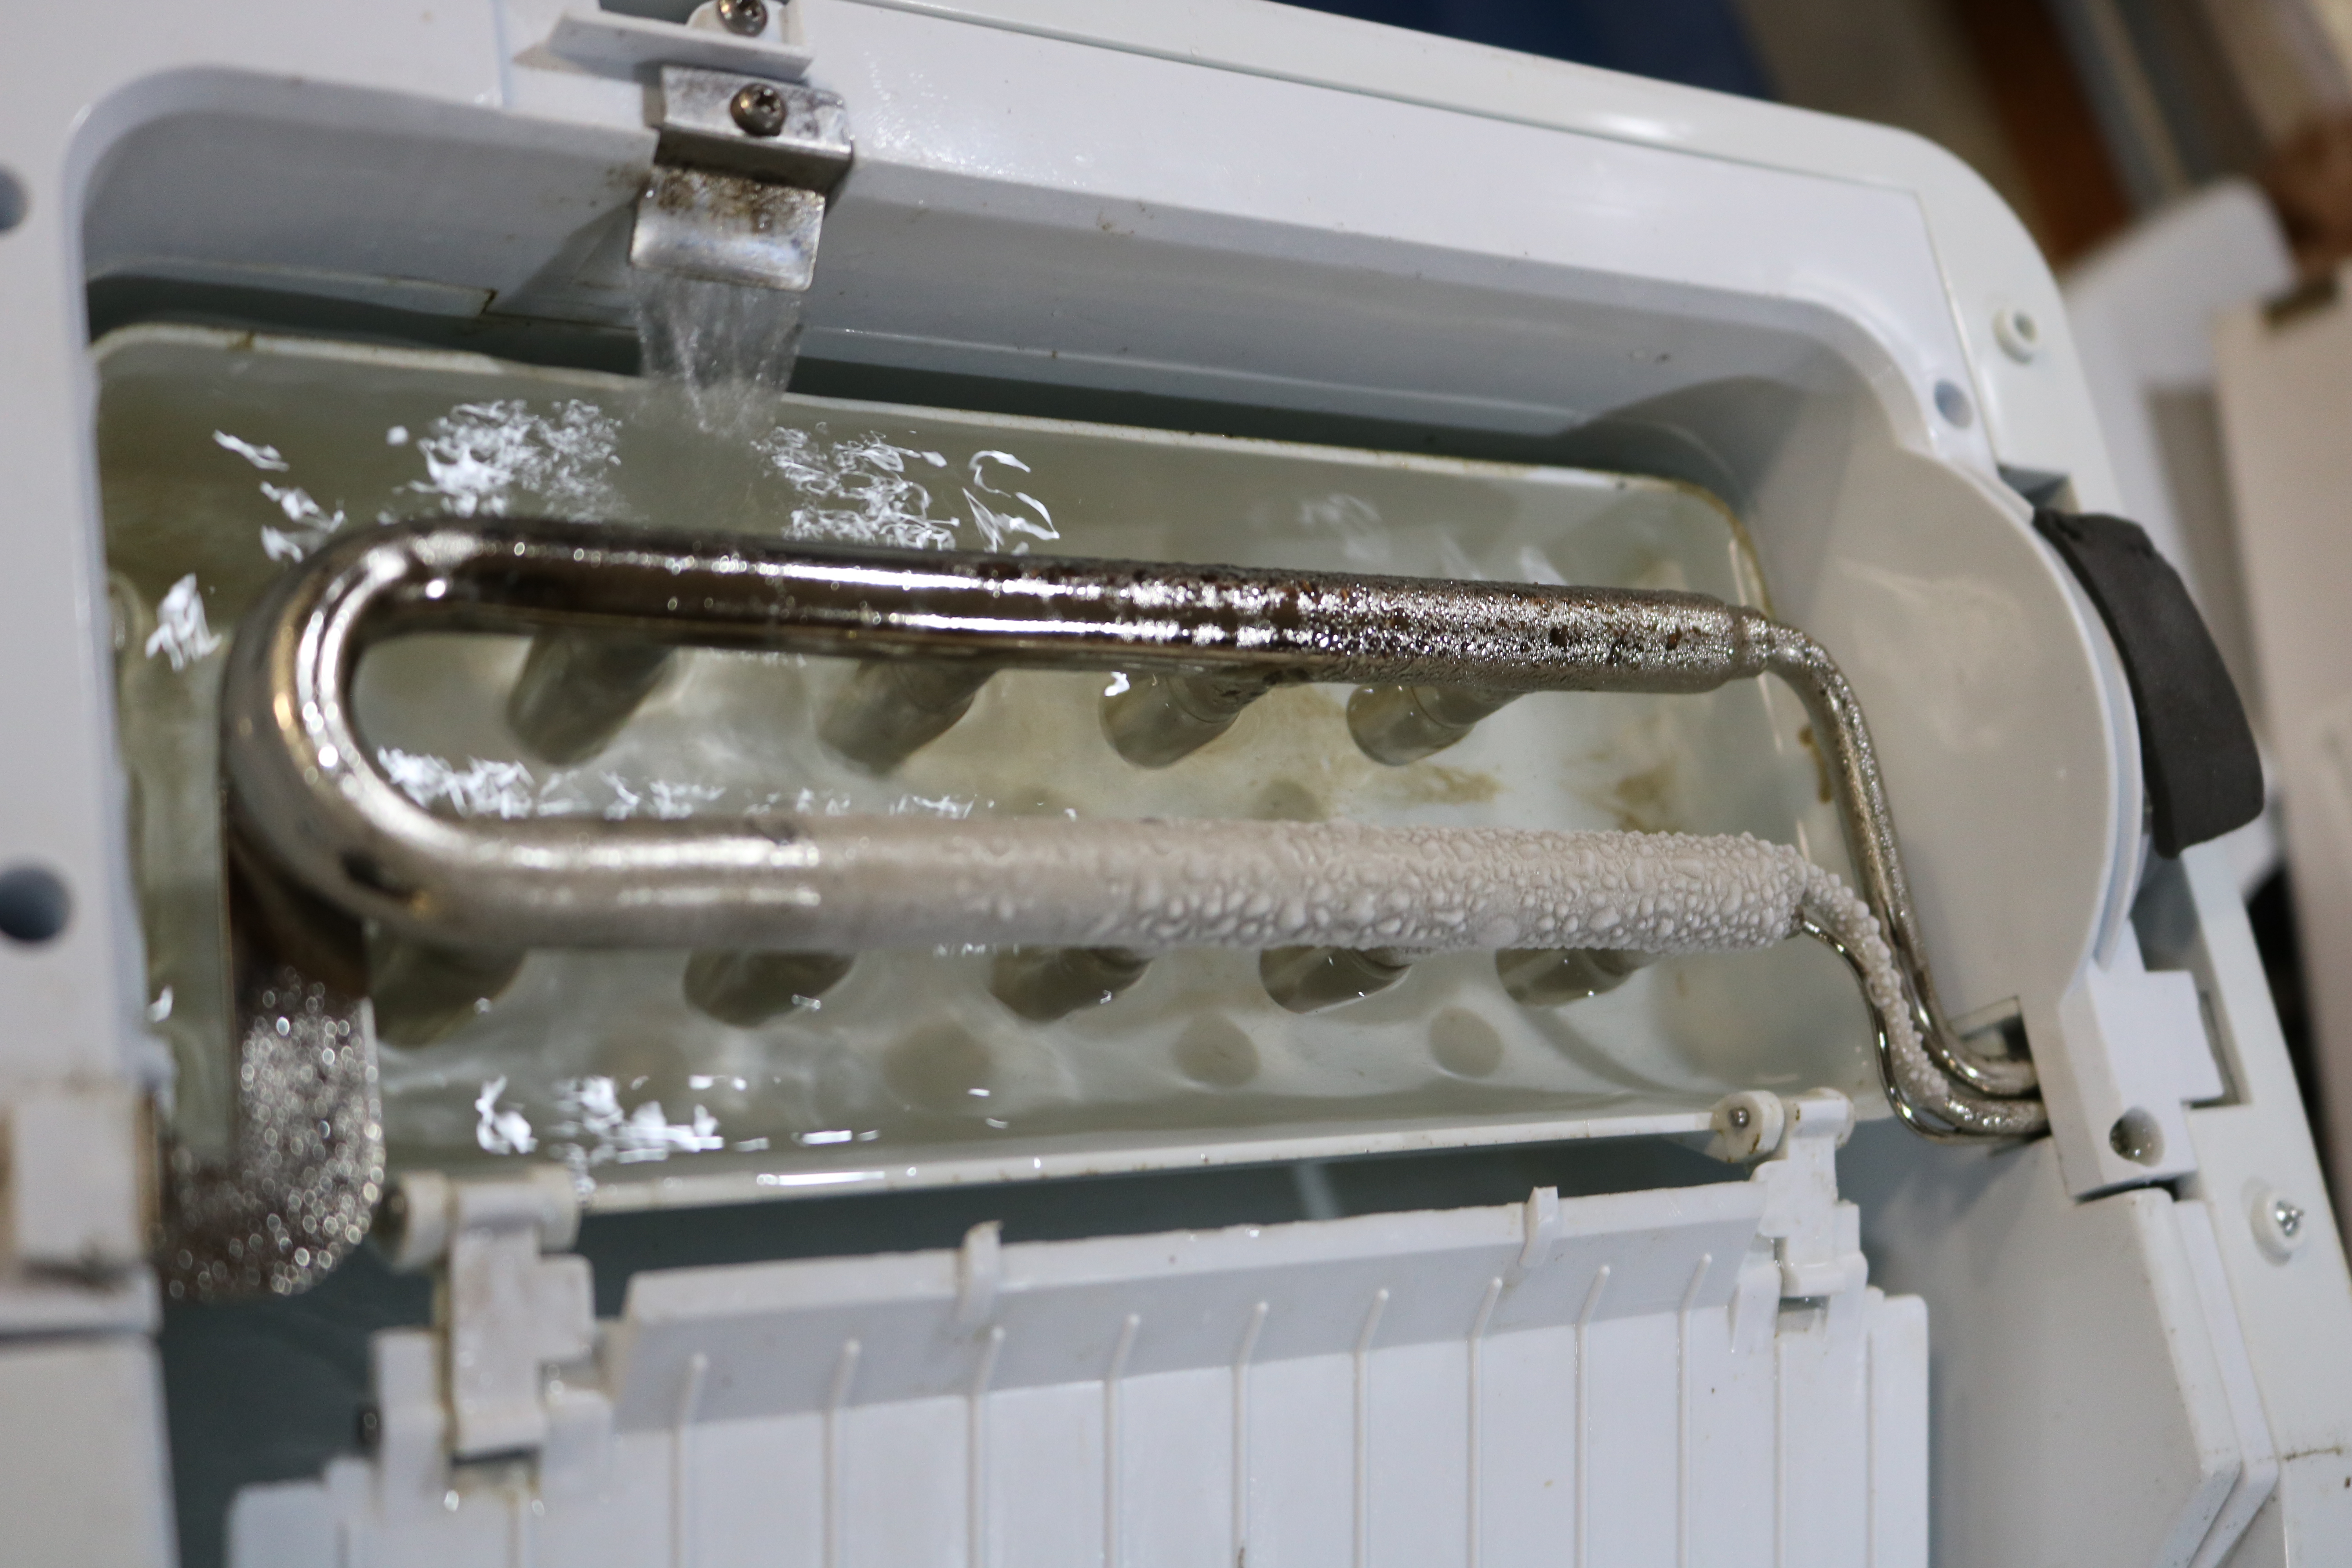
Here’s what it looks like making it’s first batch of ice after being dormant for a while:
Cleaning while it’s Apart
If you look closely in that last picture, you can see some crud in the water tray where the ice cubes are made. It’s some sort of mold, and it’s not very noticeable when the icemaker is closed up and running. But I don’t want it in my ice cubes, so now is the time to clean it up.
A little bit of bleach wiped around the inside goes a long ways, but also make sure to catch the underside of that tray–it was similarly ugly:

But we can’t just return to a normal Icemaker…what about Clear Ice?
First of all, what am I talking about? Clear ice is ice that’s clear like glass instead of frosty looking. When water freezes in a normal ice cube tray, it expands all at once and creates a pattern of voids that appear white in color. When you look at ice from a commercial ice machine though, it’s clear. How’s that?
A commercial ice machine, making clear ice, continuously flows water over the mold while the ice is being made. This allows the ice to freeze in layers, similar to the way a nice clear icicle is formed.
Normally, the icemaker runs the water pump until the tray overflows, then it shuts off while the compressor runs. If we make the pump run while the compressor is on, we’ll get clear ice too–the same kind of stuff you’d normally spend big bucks to get.
A little more examination of the board shows that the compressor is controlled by a relay with a 12V coil. The ground side is switched, just like the pump which also operates at 12V. So we can jumper between the two and both pump and compressor will run together:
How well does it work? Well, since we’re still working with a horizontal geometry, water doesn’t circulate uniformly. So the ice isn’t perfectly clear–just mostly clear. The first batch of ice takes a little longer, as it’s cooling the entire reservoir’s water content, instead of just what’s in the cube tray.
Overall though, for basically zero cost and a few minutes with the soldering iron, I’m pleased.
Time to upgrade to a fancy pellet ice machine!