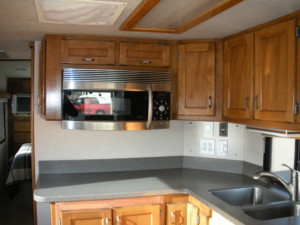
So here’s where things get interesting. How do you build a nice set of kitchen cabinets with only small power tools? As it turns out, it’s not really all that difficult, if you’re careful with a tape measure, and have the right stuff.
For this project, I bought a few new (small) tools:
- Kreg K4MS Jig Master System — If there were one tool that was absolutely critical, it would be this one. It has the jig, bits, and clamp to make pocket screw joints. When I bought it, it also included a screw kit. I only really used 2 of the screw types, and needed more of the fine-thread screws.
- Kreg KHC-RAC Right Angle Clamp — this didn’t get used too much, but it helped when putting together the toekick and a few other joints. The face clamp was used extensively, and is part of the master kit above.
- Kreg KMA2675 Rip-Cut — this was bought before the kitchen project, but had already proven its worth (and introduced me to Kreg stuff). My battery-powered 5″ circular saw’s worth was increased tenfold with this fence attachment.
- Kreg KMA3200 Shelf Pin Drilling Jig — Should be pretty self-explanatory, but this made it fairly easy to get the holes drilled without too many screw-ups.

The decision to use pocket screws was based in part on my first motorhome–at 21 years old when I sold it, its simple pocket screw cabinetry was still in great shape, and outclassed most of the wood stuff on newer RVs costing several times as much. The new cabinets would use face-frame construction, like the old ones, but would use 3/4″ plywood for the sides (where they were 2 sheets of luan with 1/2″ pine strips between them). All of the wood would be red oak, mostly 1x2s, easily purchased locally at Lowe’s or Home Depot.
Pictures are going to be pretty scarce through some of this, as I was working alone for much of it. In addition to the new tools I purchased, I also used a drill, 7″ chop saw, orbital sander, and a 5-inch circular saw–all stuff that can fit in a fairly small space (the chop saw taking up most of it).
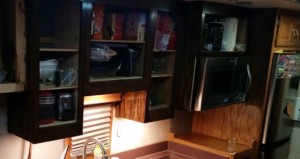
The upper cabinets actually went together pretty quickly. The face frames were pretty easy with the Kreg system, and accurate measurements when cutting the wood with a chop saw meant that everything fit together nicely. You can imagine my surprise when I lifted the cabinets up (in 2 sections) and they fit cleanly between the cabinets over the entry door and the refrigerator cabinet.

The microwave was a little more complicated. I didn’t want another hole in the wall for the vent, which meant spacing the microwave out away from the wall and building a duct up and to the right of where the old hood was. It wasn’t pretty, but the microwave isn’t going anywhere. It only sticks out about 4 inches more than it would have otherwise, and it’s higher than normal by a few inches so it doesn’t close the space in too much.
Once they were up (though it should have been done earlier), I used the shelf pin jig to drill the shelf holes, dropped the shelves into place, and was almost ready to start putting things away. Before doing that though, I added 3 4-inch LED downlights, one under each cabinet. They’re bright and at only 12W each still use less power than the 2 little halogen puck lights they replaced. These lights are bright enough that the quick picture I took left the cabinets looking much darker than they really are–I’ll definitely get some better pictures as things progress.
The cabinet over the door (far left in the picture above) was kept, but has been sanded down in preparation for stain to match the new cabinets. We’ll talk about doors and drawers in a later post.
Demolition down low starts in part 3.
One Comment Add yours