This is intended to be a step-by-step tutorial for getting your own website up and going for the primary purpose of hosting pictures that you can link to from other sites (including forms such as rvnetwork.com).
The intent is to get you in control of your own information, and get unlimited storage and bandwidth for a relatively low cost. Should rates change, service degrade, or anything else where you’re not happy, you’re empowered to move elsewhere without breaking all of your old content.
To do this, I’ll walk through setting up a hosting account with your own domain name, and get WordPress installed so that you can use its media library as a web-based upload tool.
The last part of the tutorial will show how to use a free synchronization tool so that you can upload files en masse, or update them if you’ve edited local copies on your computer.
Getting Started
The first thing to do is set up an account with DreamHost, register a domain (included with hosting), and install WordPress (which is as simple as checking a box). You can click on the images below to enlarge them. Here goes:
Start here: https://www.dreamhost.com/

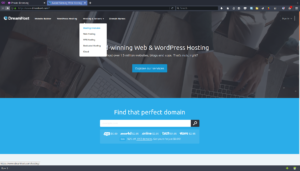

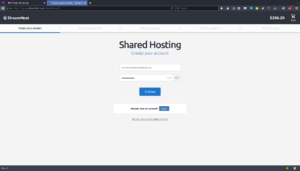
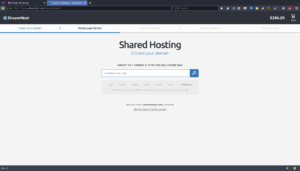
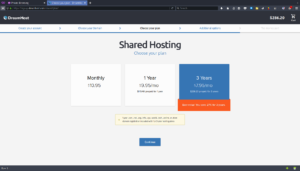
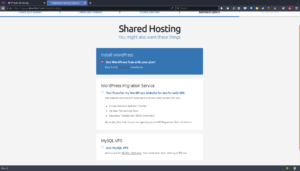
At this point, you’ll get paid up, and you’ll be able to log in to your account. The first order of business is to get an SSL certificate installed. Enabling secure communications with your site has a number of advantages, and used to come with a cost, but DreamHost makes it easy to use a Let’s Encrypt certificate for free.
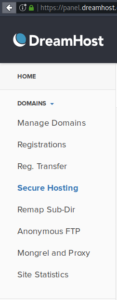

The Let’s Encrypt certificate will automatically be renewed and installed on your domain. It may not sound like much, but doing this manually is a hassle.
Setting up WordPress
WordPress provides a very simple interface to create a simple webpage, and does a few things to help search engines like Google properly index your content. We can also use the Media Library to upload pictures, tag them, add captions, etc.
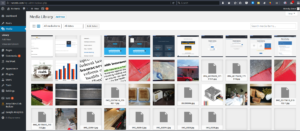
WordPress is what I’m using here, and the image below shows what the interface looks like for this blog:
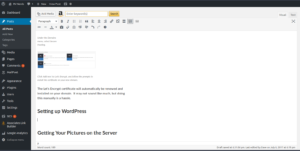
DreamHost will send an e-mail once the automated install finishes with instructions for initial setup. The only thing you need to do is secure your WordPress installation with a username and password.
Getting Your Pictures on the Server
If you’ve just set up WordPress, the easiest way to get started uploading and sharing your pictures is with the WordPress media library. Open a web browser and go to your domain (e.g. http://yourtruckpictures.com/ ) and find the log in button down at the bottom. That will bring you to the WordPress administrator interface (e.g. http://yourtruckpictures.com/wp-admin/ ).
Click Media in the left sidebar, which will bring you the Media Library. From there, you’ll see pictures you have already uploaded, along with a space at the top to upload new pictures. If you have a not-so-reliable connection, hover over Media at the left, and click “Add New”, which will bring up a slightly different page with a little more basic interface.
To get the URL to link directly to a picture, click on it and copy the image’s URL displayed in the column on the right. That’s it!
Synchronizing with your PC
You might have a folder on your PC with pictures you’d like to share publicly, or stuff you’d like to store on your DreamHost account privately as a backup. Both are easy enough, as DreamHost provides SSH/SFTP access. (I know–geekspeak). That’s a secure method of connecting to their server with a protocol that allows you to transfer files without a web browser.
On a Windows-based computer, the easiest (free) tool to use is called WinSCP. There’s a generic guide to synchronizing files here, but there’s just a little bit more information you need in order to connect.
For my own site’s security, I’m not going to show screenshots here, but will outline the necessary steps:
- Log in to your DreamHost account.
- Find Users on the left sidebar menu, and click “Manage Users”.
- Add a user, setting the user type to SFTP. I recommend accepting their randomly-generated password, not one that has any significance to you or is used elsewhere.
- After you crease the SFTP user, note what’s listed in the “Machine” column on the users page.
- Open WinSCP, and use that machine name in the host box, with .dreamhost.com added to it, e.g. mymachinename.dreamhost.com
- Enter the SFTP user name and password, and click connect.
Once you do, you’ll be sitting in your main directory for your DreamHost account. You’ll see a folder already there with the same name as the domain you registered. Anything that goes in that folder will be publicly accessible; any other folders you create will be private. Drag and drop between your computer and the server, and your files will be copied over a secure (encrypted) link.
