This time around, instead of the “wet” side of things, we’ll be looking at the electrical supply to the pump. Before we do, lets go over a few basics of how DC motors work.
Background
In it’s simplest form, electrically speaking, a DC motor can be modeled as a resistor. Power equal to the product of current and voltage, and by substitution, power is proportional to voltage squared.
This of course means that if we halve the power to the motor, it only puts out 1/4 of the work; if we double voltage, power quadruples. If you think about a typical RV DC power system, battery voltages are frequently up around 14.0V when charging, and may be down near 10V when heavily drained. With a little bit of approximation, that means that at its peak the pump is able to handle twice as much work as when the batteries are drained, assuming ideal connections.
But in practice, we rarely get ideal connections. There are a number of junctions between the batteries and the pump itself, often not so great ones, and long wire runs of marginal quality. If you have an inverter big enough, listen to the pump run when you load it with something large, like a hair dryer or toaster–your pump will slow down considerably.
What we’d like to have is consistent voltage at the pump under all circumstances–at the very least, to be getting the voltage it was designed for at all times. We may also be able to “boost” the pump a little (within reason), to further enhance performance.
How are we going to do this? It all starts with a simple DC-DC boost converter, like this one available for [amazon_link asins=’B00E8D7XYG’ template=’PriceLink’ store=’rvne-20′ marketplace=’US’ link_id=’fe6ac235-a48e-11e7-acdc-8179e370b902′]:
[amazon_link asins=’B00E8D7XYG’ template=’ProductAd’ store=’rvne-20′ marketplace=’US’ link_id=’0d11103b-a48f-11e7-add6-6b7bb5f10971′]
What this little device does is take the voltage coming in and step it up to the voltage you set, regardless of the incoming voltage (within reason). What we’d like to do here is set it so that it always supplies at least 14V–keeping the pump running smoothly, and preventing it from slowing down as much as it reaches the pressure cutoff.
Installing the DC-DC Converter
So how do we make this work? If you want to make it really easy, you simply have to cut both power and ground wires feeding the pump, connect the supply side to the input terminals, and the wires going to the pump to the output. That’ll work just fine, but we can do better.
The board does use some power. Ideally, we’d only like it powered when the pump is switched on, and when the pump is running. To do that, we want to supply power to the board after it goes through the pressure switch.
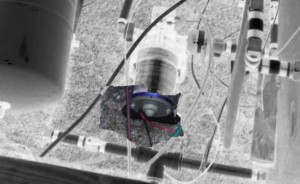
Instead of cutting the wires before they get to the pump assembly, we’re going to cut the wires that go directly into the motor housing, usually at the bottom:

Regardless of where you make the connections, you’ll then need to set the current and voltage output. The current limit can essentially be adjusted out of the picture–unlike when driving an LED, the motor’s current doesn’t rise rapidly with voltage–they’re directly proportional.
That leaves the voltage setting. Use a voltmeter on the output terminals to set the voltage at about 14V by turning the screw. Alternatively, skip the voltmeter, and with the pump running, increase the voltage until you hear the pump speed start to drop–which will occur as you exceed the ability of your supply to provide the minimum input voltage. Don’t get too carried away–while 24V is probably perfectly safe for the pump, much more than that will likely shorten the life of the brushes inside.
That’s it! If any of this doesn’t make sense, leave a comment or send a message and I’ll try to help you out.