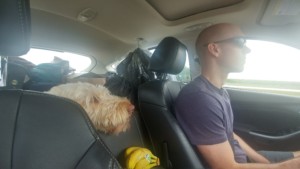
Seven countries, six airplanes, five public transit systems, four airlines, three bags, two guys, and one dog waiting patiently for us to return. So why is a European road trip, without the RV, of interest here? Well, it’s travel. Sightseeing. Driving (about 3,000 miles of it in total). It’s seeing other RVs, lots different that what we’re accustomed to here. And like a lot of my RV travels, it was pretty spontaneous. This is the first post in the series, and will cover how we laid out the basics of planning the trip, and will be followed by a travelogue of sorts with all kinds of pictures along the way.
Planning the Trip
Or not. The general idea of a trip, to visit John (you have seen the about page here, right?) before his stint in Vienna comes to an end, has been in the works for a while. But getting down to brass tacks, figuring out dates and logistics, was pretty last minute. We pulled out on a Tuesday, having booked our transatlantic flights only a few days prior (over the weekend). We had to pack, finalize arrangements for Milo to stay with my brother, arrange dry cleaning for a wedding on the way back, book more flights, and figure out where we were going and when.
Of course, in addition to being last-minute, we also wanted to do it cheaply, and I’d say we did fairly well in that regard. Total airfare, which included 5 separate itineraries, was under $800 per person. Overnight accommodations while in Europe averaged $112/night, including taxes, parking, etc. (To be fair, that number includes a couple of nights where we rented a 2-bedroom, 2-bath apartment when 4 of us went to Berlin for the weekend. $102/night average when it was just 2 of us.) We splurged on a rental car with Budget, but the total ended up at $250 for 10 days, including taxes.
So…how did we do it? To start with, we had a simple objective. Get to Vienna and back, and see whatever we could along the way. When we started planning, we didn’t have a bunch of criteria. We started off finding the cheapest ways to get to and from Europe. That meant looking at multiple cities for our departure, and not restricting ourselves to the same airports on either end of the trip. Sites like Kiwi are very good for helping when you’re wanting to search all airports within a specified radius of a given location. As the search narrowed, we decided that Milo would stay in Cincinnati, and we’d start and end the European part of the trip there (the wedding was in Tennessee, so it was more convenient than Chicago, which was a close runner-up). The bottom line was that we weren’t going to over-constrain ourselves to the point that we paid a significant premium just to do it all on one itinerary.
Transportation
I actually enjoy sifting through all of the combinations of trip itineraries, getting creative about how to have the most fun possible for every dollar. Getting to where we settled on that included having a rough idea of some other details, like the rough cost of getting from London to Vienna, and from Vienna to Copenhagen. But we got those flights booked before settling all of that into place.
For just over $1,000 (total for both of us), we were bound for Europe–committed, it’s happening, no refunds. We found a flight from Cincinnati (CVG) to London-Stansted (STN) on Wow Air, with a stopover (no plane change) in Keflavik, Iceland, and would fly from Copenhagen (CPH) to Newark (EWR), also connecting in Keflavik on Wow, on the way back. That meant a few more details–getting from Newark back to Cincinnati, and getting from London to Copenhagen (eventually–with lots of other stuff in between).
Rental Car

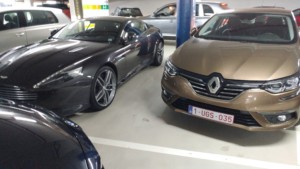
Next, we started looking at rental cars. We knew we wanted to do some sightseeing at our own pace, we’re both car enthusiasts too so that helped. But like a lot of RVers, part of the appeal was the flexibility to stop and stay longer when we found something interesting, not constrained by a train, bus, or plane ticket. We looked around at several places to rent, including Brussels, Copenhagen, Frankfurt, Hamburg, Vienna–pretty well anyplace we could get to easily from London. But we zeroed in on Brussels pretty quickly. The first search on Budget’s website returned a rate of $28 for 10 days. Not $28/day, but $2.80/day!! Of course, taxes and fees raised that number quite a bit, but it was still really cheap. So cheap that we opted to upgrade to a nicer car at $11.50/day (before taxes).
Getting to the Rental Car
Now we just needed to figure out getting ourselves from London to Brussels, and Brussels to Copenhagen. We looked long and hard at bus and train options. The bus might not have been bad with an overnight run, saving a hotel, but we knew it wouldn’t be as pleasant as sleeping in a real bed. It would have left London around dinnertime too–which meant we lost a night in London to do stuff.
The train was more appealing in terms of scheduling, but was pretty pricey. It would have been about $300 for the two of us, in part because we’d be booking so late. Instead, with just a few frequent-flier miles on United, we were able to book tickets on Brussels Air considerably cheaper. It was even more appealing flying, as the rental car was at the airport on the outskirts of town, not at the downtown train or bus stations.
Getting from Brussels to Copenhagen was kind of the same thing, though it made a little more sense to fly once you had a look at a map. The ground-based route between those two cities is far from direct. This time it was Scandinavian Air, but still booked through United. In both cases, we were paying 12,500 miles, the taxes, and the $75 fee for booking on short notice. It’s starting to come together now…good thing, as we booked these the day before we hit the road!!
Lodging
Once we got to Vienna, lodging was easy–John would be taking care of us. But we had about 4 days to kill, as he was on a trip of his own. As we envisioned it, we’d spend 3 nights in London, and then get the rental car and make our way to Vienna. I say envisioned, because planning sounds way too formal. Most nights, we didn’t book our accommodations until that evening, sometimes only an hour or even a few minutes before we arrived. Internet access will be a section on its own in a bit. We used sites like AirBnB, Hotels.com, and Hotels Tonight.
Interestingly, when looking over the spreadsheet, commercial hotels were both the most and least expensive nights of the trip, with the AirBnB rooms in the middle. The key here was being flexible, and having the ability to search while en route. We hardly roughed it, and stayed at some pretty neat places.
Food
Ok, this is probably one of the highlights of a trip like ours. Lots of food in new places that we haven’t had before. But free refills were almost non-existent, and ice was hard to find. But we had a rental car for most of the trip, and made a trip to a grocery store to stock up. We certainly saved some money by having some food along for the ride with us, instead of buying at each travel plaza along the motorway. You know, just like I would eat when on the road with the RV, but scaled back a bit.
Now for the fun stuff…Day 1: Getting to London
| Today | 521 mi | 3,593 mi | 24.1 mi | 2.8 mi |
| Total | 521 mi | 3,593 mi | 24.1 mi | 2.8 mi |

The first day of the trip started with a quick road trip from Iowa to Cincinnati. Pretty uneventful stuff–I-80 to I-74. We had to get Milo situated with my brother, we’d go out to a hole-in-the-wall (literally) for dinner (one of the best–order a turtle at Gomez, in OTR), drop off suits at a dry cleaner, and head to the airport around 10 pm. Neither of us had flown Wow (or any other discount carrier for that matter), and knew that the basics on other airlines were all paid services. Since they charge for a carry-on bag, we crammed stuff as tightly as we could, taking only what we could fit in two personal items (backpacks) and one carry-on bag. That way, we only paid the fee for one of us–and looking back, I’m really glad we didn’t have an extra bag to mess with.
Of course, we booked last minute, and booked the cheapest fare. We hoped we’d sit together, but knew there was a good chance we wouldn’t be so lucky. We checked in online, and got row 36, sitting together. How many rows are on one of these A321s? Yep, 36. When it came time to board, we saw a boarding scheme I haven’t seen on a major carrier in a long time–simple back-to-front. We got on, settled in, and when the main door closed, had an empty seat accompanying us from CVG to KEF, which was the longer of the two flights at about 6 hours.
Wow! is right.

First of all, this was an A321neo. The neo is for new engine option, and that meant that we were on a variant of the A321 that has only been in commercial service since May of 2017–in other words, we were on a nice, clean, new airplane. The new engines are more efficient (something like 16%), half as loud, and at maximum weight get to cruising altitude 4 minutes faster. The newer setup also has USB charging ports and power outlets at every seat, making self-entertainment a little easier.
It was after one o’clock in the morning (technically day 2…), so after taking off, we tried to get some rest. Even though it was the last row, our seats still reclined the full, almost-not-enough-to-matter standard amount, without the guilt of smashing knees behind us. It wasn’t great sleep, but it wasn’t bad either. The airplane was definitely pretty quiet.

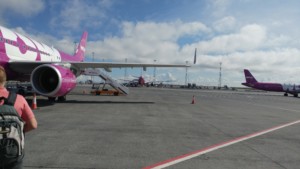
Interestingly, landing in Keflavik was an outdoor affair. We deplaned onto the tarmac, and walked into the terminal at ground level. That might sound like a negative, but Wow made use of both the front and rear exits, so we spent very little time waiting. We were on the ground long enough to find restrooms and stretch our legs before hopping back on, entering at the rear, and moving to our new seats–one row further forward.
Wow flies into London-Stansted, which is little ways out from downtown London, but possibly the easiest/quickest for getting into town. Once on the ground in the airport, we made our way through immigration, bought coffee using Google Pay, and then bought our tickets for the Stansted Express, the train to take us to a connection point with the Docklands Light Railway. We could have taken a bus, but that would have been a slower road trip.
Stansted Express

The Stansted Express definitely set the bar high for rail travel. While the fare was maybe a little expensive, at $25 each (including the fare for the DLR for the last leg), we got onto a very new train, with air-conditioned cars, futuristic-looking restrooms, free high-speed internet access, power, and a very smooth, quiet ride at speeds up to 100 mph. The internet was kind of interesting waiting after our first train. Since it was provided on the trains, when there was a train in the station, we had great wireless service, but it left with each train.
The Docklands Light Railway is new in terms of the London public transit system, but older than the Stansted Express–and more typical of transit in London. It’s a low-speed, high-frequency service, with colorful cars and a very-80s shape to them. We rode just a few stops, hopped off, and headed to meet our host, set down our bags, and shower. It would be the first of many rides on the DLR.
Since we’ve reached a place to set our bags down, shower, and snooze, I suppose now’s the time to end a long first day, and pick up with setting out on the streets of London.
Buying Stuff without Dollars
I suppose it’s worth mentioning here that we made extensive use of Google Pay on this trip. I’d used it a few times in the US, but acceptance was almost universal in Europe. We didn’t encounter anywhere that accepted credit cards at all that didn’t accept contactless payment. From a security standpoint, there’s a huge benefit–merchants only get a one-time-use token, not the information on the magnetic stripe. We all know that you can make online purchases with that information–name, card number, and expiration date–so the less-shared the better.
It also meant that we could carry less stuff in our pockets. While we both carried a couple of physical cards, we really didn’t need to. You won’t find card-and-signature authentication in Europe–it’s all card-and-PIN, and we didn’t want to keep track of (or have to set) PINs with each credit card issuer. Google Pay made that extra work unnecessary.
As for the cards themselves, make sure you have (at least) one that doesn’t have any foreign transaction fees. Generally speaking, you get much, much, better conversion rates with your credit card than any currency exchange or merchant. Out of curiosity, we looked at a few–it was not uncommon for a buy/sell spread of 30%! Never mind that they said “no fees”, the cost was in the conversion rate. Give $1.16, get about 0.90 Euros. Sell those Euros right back and get about $0.70. Crazy!
You’ll also see that standard practice at restaurants is to bring the card terminal to the table. You should never have to let a physical card out of your sight–ever!–a practice I wish was a lot more common back here in the US. Usually, the waiter/waitress hands you the terminal at the table. You can review the bill amount and enter a tip if you wish. Then you either touch your phone or insert your card to complete the transaction. The card terminal prints your receipt right there, making getting out of a restaurant much more efficient. It’s a single trip to the table, not the 3-trip minimum to pay by card in an American restaurant. Think about that until next time.