It didn’t look that dirty for the most part when I got it, but I knew it wasn’t the cleanest. The ceiling just had a slight grey hue, and if you took something down (like I did with the kitchen remodel), you could see a definite difference in color.
Some of that was yellowing, which I couldn’t do much about. But the dirt had to come down. It’s a padded vinyl of some sort, so it shouldn’t be that hard to clean, right? Well, as far as I can tell, the film is a mix of oily particulates, possibly from diesel combustion, dirt, road grime, and who knows what else. But the oily particulate bit is what makes it an interesting animal–it’s not a typical dusting or kitchen cleaning operation.
I’ve had several “false starts” trying to clean it–I’d do one small section, only to get frustrated by how slow it wast going and stop. It was also tough to see when you’d gotten it all removed–the difference wasn’t so stark as to be obvious when you’re up on a step stool.
But finally, last week, I got to a routine that seems to work pretty well…
What doesn’t work:
- Eraser bars
- Dish detergent
- “All-purpose” stain removers
- Degreaser with a sponge/rag
- Steam cleaning
Here’s what I ended up using:
- A citrus degreaser
- Magic Eraser bars
- Bowl/cup of water
- Paper towels
Cleaning Process
The first step was to spray the citrus degreaser on the ceiling, making sure to not stand under it, and to wait while the mist falls after spraying.
With a damp eraser bar, quickly wipe the area. No scrubbing, just making sure you’ve gone over it all. Then rinse the eraser bar in water (which will start to darken…), and wipe again. Make sure the eraser bar has enough water in it to keep the ceiling damp.
Finally, wipe the ceiling dry with a paper towel. Rinse the bar, go get clean water, and repeat. For the most part, I was working areas <10 square feet at a time. It’s no big deal if the grime dries back, except that you’re redoing the work to get it off.
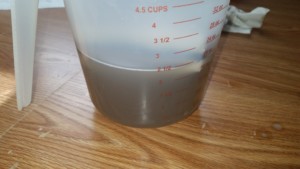
To give you a feel for how much dirt was coming off, here’s what the cup of water looked like after cleaning half of the ceiling over one of the bunk beds:
That probably only took five minutes or so. But fair warning–if you start this, you’ll have to do the whole thing. The one clean area makes the rest obviously dirty!
I’ll get some pictures up soon with what it looks like all cleaned up and with new white trim on the ceiling.

Did your ceiling turn out nice and white once you completed your ceiling project?
It’s as white as it’s going to get! I put up new PVC trim, which is still more white than the vinyl. I may end up painting the trim, just so they match better. I’ll post more pictures once I finish re-staining cabinets. I really need to do a full tour of the Grey Ghost!
240,000 miles! Wow! Good tip for the ceiling I’ll remember that. Happy trails and give Milo a big hug.