My Weber BabyQ propane gas grill has seen a lot of things. I bought it my first summer RVing, and since then it’s been all over the country, spending most non-travel days sitting outside. This post will talk about its regulator failing, and how I replaced it without the $50 part from Weber.
Now well more than a decade old, Weber has made a few improvements since mine rolled off the assembly line. But the basics are still the same. It’s an aluminum shell, with a cast iron cooking surface, pushbutton ignitor, and plastic frame. I like that it’s made in the US. It’s also one of a few that I could fit in my old Safari’s small storage compartments. Since 2006, it’s been cooking flawlessly: never a grease fire or flare-up, the igniter still lights every time, original burner, valve, regulator, etc.–until now.
On a couple of occasions a few months ago, we noticed that stuff was taking longer to cook, and it didn’t seem to be getting as hot as it should. The sear and grill marks I was used to weren’t what they should be. And on occasion, when you opened the lid, you’d briefly see an orange haze inside the grill: sure sign of a regulator failure.
A quick search turned up the appropriate Weber part, but I didn’t want to part with $50. Considering some complaints about its quality, I was even less inclined to pay that much. But the connector for the 1-lb disposable cylinders was built in, and trying to find a similar part wasn’t turning up much. Amazon, eBay, and other sources were all in about the same price range.
So I shifted gears. What if I bought a hose and regulator instead? The local hardware store had a hose and regulator for less than $20, and the fittings to connect it to my Weber control valve were less than $10. At that point, I could get back to grilling with a normal 20-lb cylinder. Ordering a steak saver adapter gets me back in business with the 1-lb disposables.
Parts List
Note: This list will work for just about any Weber propane grill, but continue reading to make sure you order the right fittings the first time.
- Regulator and hose
- Steak saver adapter
- 3/8″ flare to 1/8″ female pipe thread adapter — You can adapt from 3/8″ flare to 1/8″ pipe thread with fittings from your local hardware or home improvement store, but in most cases it will take two fittings to do it. The linked fitting may be a bit more expensive, but lets you use a single fitting for the job.
- 5/8″ flare nut wrench or more common open-end wrench
- Channel-lock pliers and/or rubber strap wrench
- #2 Philips screwdriver, less than 12″ overall length
- Pipe thread tape
Procedure
I really shouldn’t have to say this: turn off the grill, let it cool, and disconnect the propane before starting.
1. Remove the control knob by pulling straight out (toward the right if you’re facing the front of the grill.
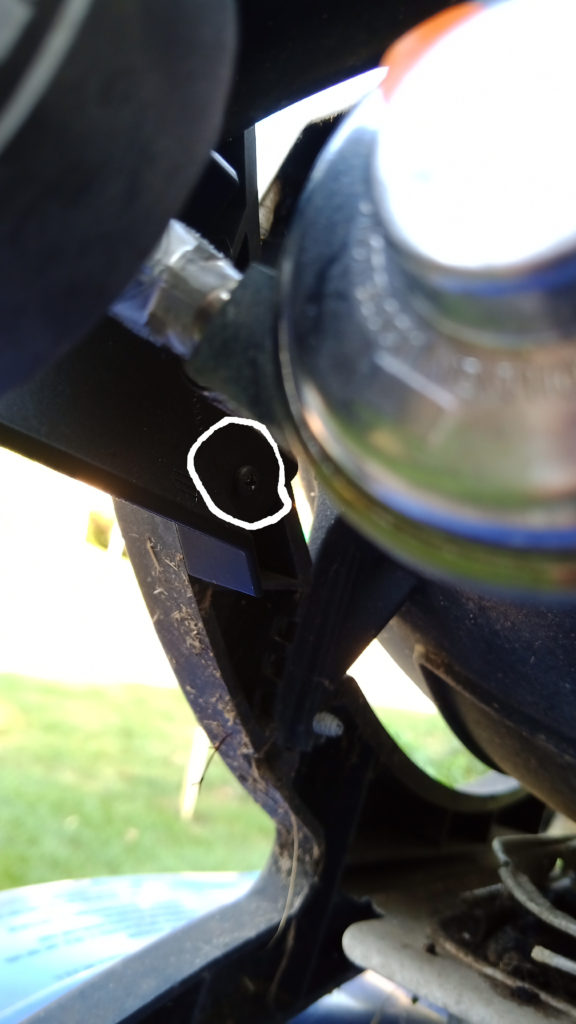
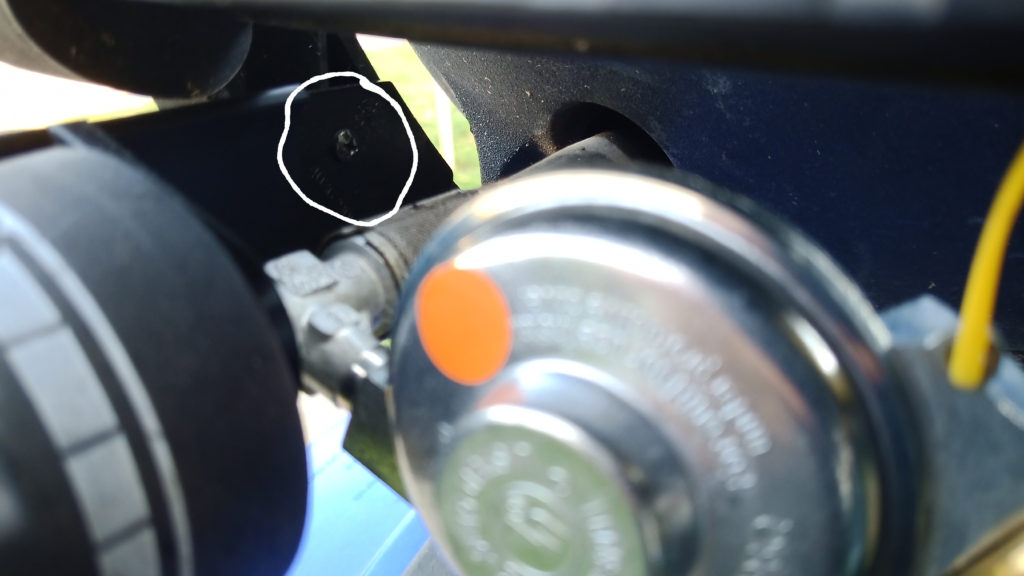
2. Unhook the regulator and valve assembly from the plastic grill frame by removing two Philips screws. Make sure you get the screwdriver lined up right, to avoid stripping the screw heads.
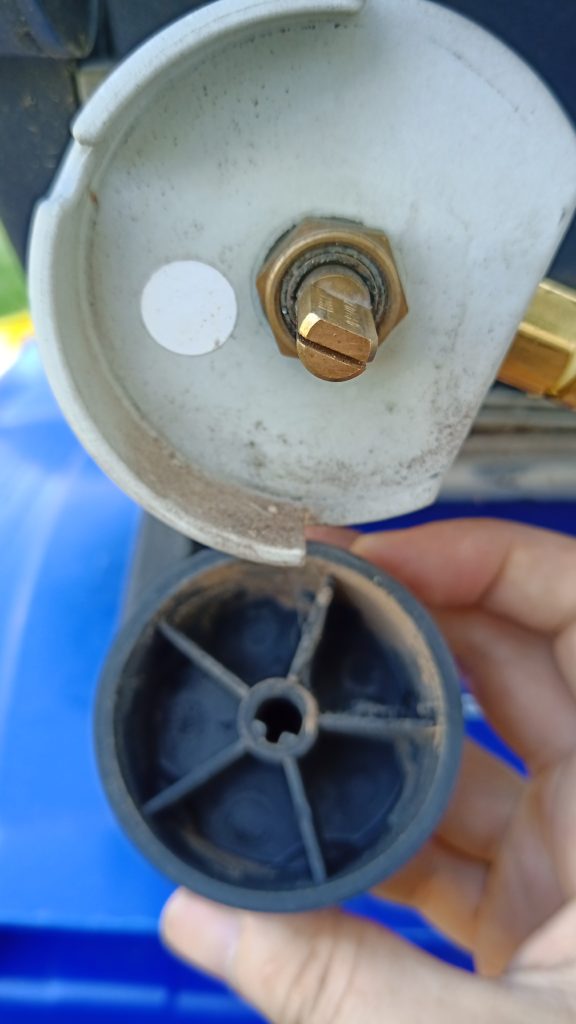
3. Carefully slide the regulator and support bracket out of the grill frame. Make sure you don’t bend the burner tube or get dirt into the valve’s orifice.
4. Remove the nut holding the valve to the bracket, and separate the bracket from the valve.
5. Unscrew the regulator from the valve. Use pliers and/or strap wrench as necessary.
Reassembly
6. Wrap the male threads of the valve with pipe thread tape, then install the adapter fitting(s).
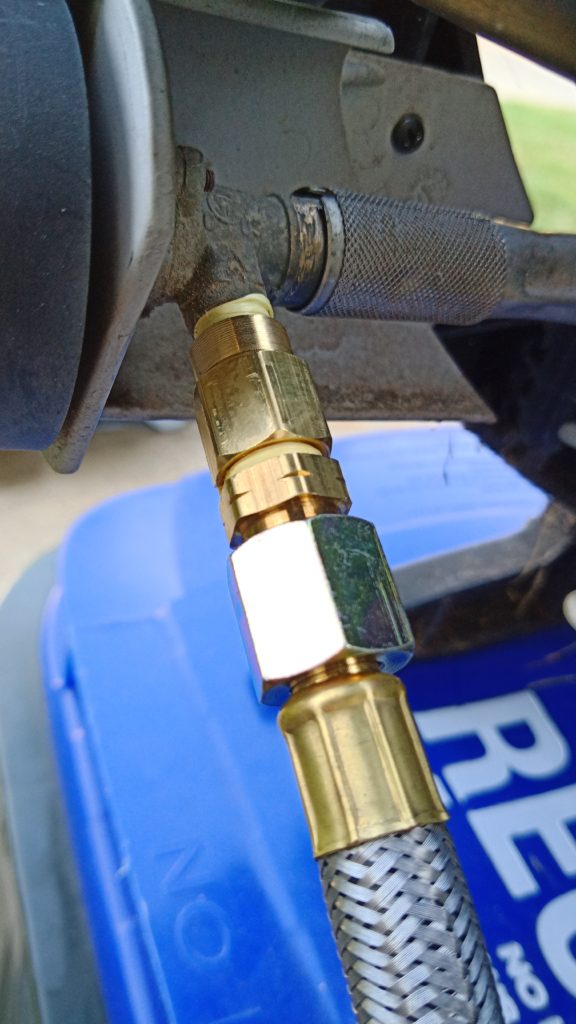
7. Connect the end of the regulator and hose assembly to the flare fitting now attached to the valve. Use the 5/8″ wrench to tighten the hose and fittings.
8. Put the valve back onto the bracket, and secure with nut removed in step 4. Make sure you align the valve tabs so that it is oriented as shown.
9. Reinstall the mounting bracket, and secure with the screws removed in step 2, and push the control knob back onto the valve.
10. Connect propane supply (either 20-lb cylinder or 1-lb cylinder with steak saver adapter), test, and get back to camping!

Check out the Resources page for other helpful articles and links.