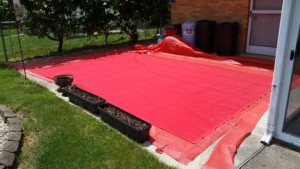
It’s new awning time! After a tear in the Sunbrella fabric that was put on in 2012, it was time for something a little different. I was never happy with the Sunbrella material–it tore easily, and was too tightly woven to allow light breezes to pass through. In other words, it was always fluttering. At 5 years old, it needed to go.
My old Safari motorhome had a different material–instead of an acrylic fabric, it had a vinyl-coated polyester mesh. When I sold that rig at 21 years old, its original awnings still looked brand new. There wasn’t the slightest tear, they breathed well, and water couldn’t pool on them. (In a hard enough rain, water would drip through) I’ve been able to find the same stuff, but only in 60″ widths, and it’s quite expensive.
While looking for something else, I came across [amazon_textlink asin=’B01KU8OOW6′ text=’this material’ template=’ProductLink’ store=’rvne-20′ marketplace=’US’ link_id=’d13b3dd5-554e-11e7-af3b-37940f8bb568′] that I could get for about $75 big enough to do one of my 10’x16′ awnings with no seams.
It’s not exactly what I wanted, but it’s an open mesh, non-fraying, and most importantly, cheap enough to try. If you look at the reviews, there are lots of people that leave them out in all kinds of weather (not always without incident), standing up better than you’d expect with most RV canopies.
Ordering New Fabric and Supplies
The awning fabric is obviously the main component to deal with here. There are a number of sellers under different brand names, but they appear to be very similar. The most important thing to note is that the edges are curved–you need to buy a a bigger shade than your awning dimensions. In my case, I bought a 16×20′ shade for my 10×16′ awning. I had lots left over, but the difference between the two advertised sizes was about $15.
[amazon_link asins=’B01KU8OOW6,B01MZ79HVE,B01MT9LKHO,B01KW27602,B01MZAAS12,B00WODYJR6′ template=’ProductCarousel’ store=’rvne-20′ marketplace=’US’ link_id=’ba2276e8-5568-11e7-a5dd-d955bf419024′]
You’ll also want to use a good outdoor thread. That means polyester, not nylon. You can get this at a fabric/craft store like Jo-Ann, though I found they had very few colors. Look for the weight to be advertised–this one is 130g:
[amazon_link asins=’B06Y5V3W25′ template=’ProductLink’ store=’rvne-20′ marketplace=’US’ link_id=’b3dd749e-5ccf-11e7-83ab-9d09c5494dcb’]Outdoor thread
The Tools
So the supplies are well under $100. What about tools for getting the job done? You could buy all of them for under $100 if you didn’t have them, and still be far cheaper than a typical awning replacement:
- Sewing machine. Nothing special here. Mine is a $70 machine I bought at Wal-Mart.
- Scissors. Good ones. The fabric cuts easily, but don’t forget you’re going all the way around the awning. Being left-handed, for a job like this I wanted [amazon_link asins=’B00006IFN8′ text=’left-handed scissors’ template=’ProductLink’ store=’rvne-20′ marketplace=’US’ link_id=’5da9a0a1-5cd0-11e7-ad37-adcb43491e6a’].
- Tape Measure. Doesn’t need to be a long one. You’re only measuring the amount of excess to finish the seams. Though you might need one before you start to figure out how big your awnings are.
- Binder clips. I prefer these over clothespins or other similar clips, and you really don’t want to use straight pins on this fabric (they’ll slip out too easily).
[amazon_link asins=’B006NFJEH6′ template=’ProductAd’ store=’rvne-20′ marketplace=’US’ link_id=’1e30e375-5cd1-11e7-b5aa-91e51590c4e2′]
Getting the Old Awning Fabric Off
Experience helps here a little. I took the fabric on and off with the old awnings, so I knew what was involved. Extend the awning just far enough to get to the arms, loop a ratchet strap around them, and then unroll the awning the rest of the way. Line up the roller tube slot with the opening in the end cap, and then take the end plate/tube support off (3 screws). Taking off a couple more screws on the lead rail frees the fabric to come off.
When I did it the first time, I used the service manual for my awning and this video as a guide:
Second time around, it went a lot quicker. I purchased a [amazon_textlink asin=’B001NT2LK4′ text=’long-reach Allen wrench bit set’ template=’ProductLink’ store=’rvne-20′ marketplace=’US’ link_id=’e68afa58-55c7-11e7-a422-d3e6f5daa94b’], which allowed me to use my cordless impact driver instead of a manual ratchet. I also
Measuring and Cutting the New Fabric
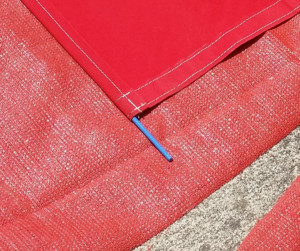
This is actually pretty straightforward, if you have the flat space to do it. I laid out the old awning on top of the new, and added 1.5 inches to each of the exposed ends so that I could fold them over for a finished hem. I also added an inch to each of the edges that attach to the rail, so that I could fold them over for the cord pocket
Fortunately, cutting was pretty easy with a good pair of scissors.
Finishing Exposed Edges
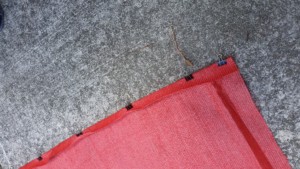
To hold the material in place, I used binder clips from Wal-Mart. Measuring and clipping about every 6″ held things in place nicely, and I had room to sew without taking the clips out as I went.
Unfortunately, I didn’t get any pictures while I was sewing. I simply ran two rows of straight stitches, with a fairly long stitch, at both ends. It took almost as long to write this as it did to run down each edge.
Sewing Cord Pocket
My 89-year old grandmother helped me with this project. Despite what might sound like an old lady, she still does alterations for people out of a converted bedroom in her house. She talked me into a slightly different approach on the cord pocket than what I had planned. I simply folded the fabric over the cord, pulled it tight, and ran the loose edge even with the left edge of the presser foot on the sewing machine.

Installation
It’ll sound cliche, but installation was the reverse of removal. You have to get both rails going together, manage the loose fabric, and avoid rushing. I learned the first time around that some of the edges on the lead rail are quite sharp and can easily tear the fabric.
Center the fabric on the lead rail before putting the retaining screws back in, then roll it in and out a few times to get it centered on the roller tube. After that, just a little tweaking of the motor stops and it’s good to go!

Realistically, between the drive between my RV and my grandparents’ house, climbing up and down the ladder getting fabric on and off, and doing the sewing, it probably took me 3 or 4 hours total. Not bad at all in my book.

